Week 2: Trying Out Crochet Triangles

Written by Freddy
Wow!
This was an incredibly difficult post to get started on! To be perfectly honest, I almost never use triangles in amigurumi creation, so I didn’t have much insight to impart when I sat down to write this. Then I realized that might be a blind-spot worth exploring. It is hard to imagine how you could utilize a tool you don’t own!
A year or two ago Goat and I took a pattern designing class from the amazing fiber artist Lily Chin. The message I took away from that class was this: The only limits to our creativity are those imposed by the tools we have access to. The more skills and information, the more ways we have to achieve the image in our heads. And, quite possibly the more freedom we have in dreaming.
So, for me, this post is about broadening my horizons. It is an investigation into the triangle for the purpose of turning it into a regular tool in my toolkit. I may use the tool infrequently, but at least it will be there when it is the best one for the job.
I hope my bumbling exploration will help you in some way. Whether that is helping you think through something you have been wanting to create, or even confirming you in your opinion that triangles are a whole lotta hassle for not much benefit😂

The only limits to our creativity are those imposed by the tools we have access to.”
– Freddy, 2023 (Wow! What a sage🤣)
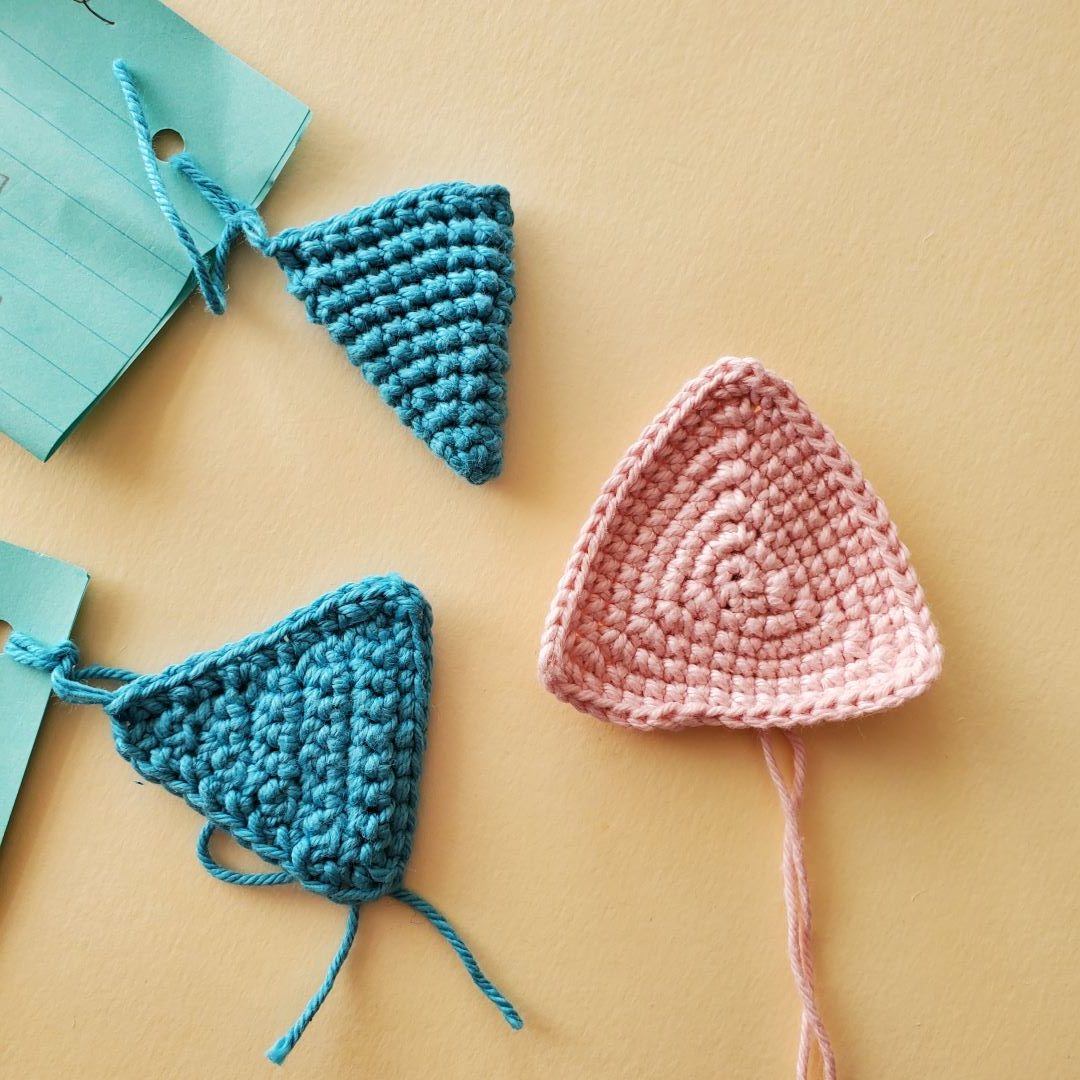
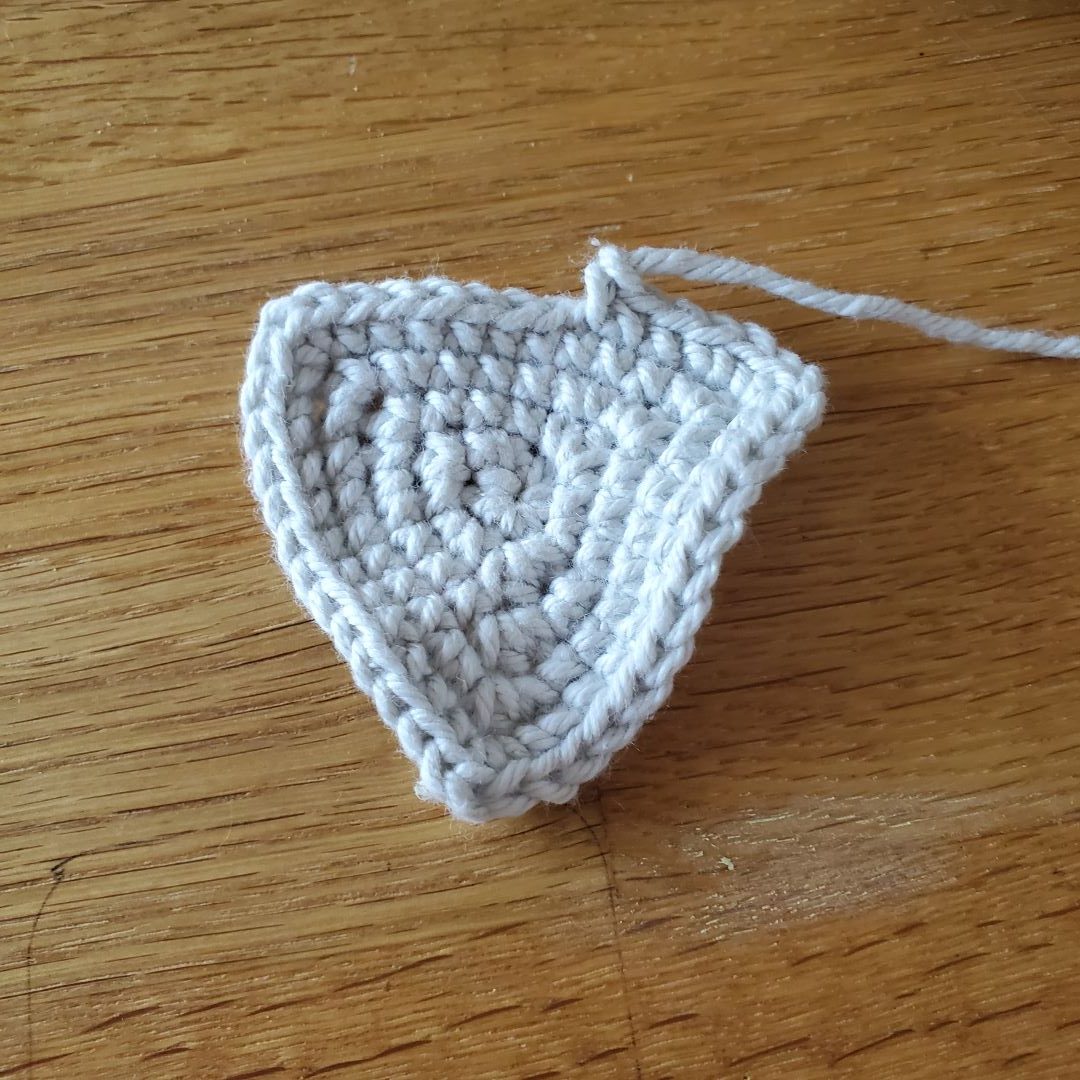
Clockwise from top: A cone worked in rounds then flattened and crocheted together across the top; a triangle worked flat in rounds; a triangle worked flat in rows then edged with a round of sc
Rows or Rounds
The First question, as usual, is whether it makes more sense to make this shape with rows or rounds. As with most things, this seems to depend on what you are using it for. In preparation for this post I tried so many things and ultimately the *easiest* triangles are made with rows (not terribly shocking), but I also liked the results of simply flattening a cone worked in the round and can see how this might be used very effectively in some ami contexts (for example surface details like noses).
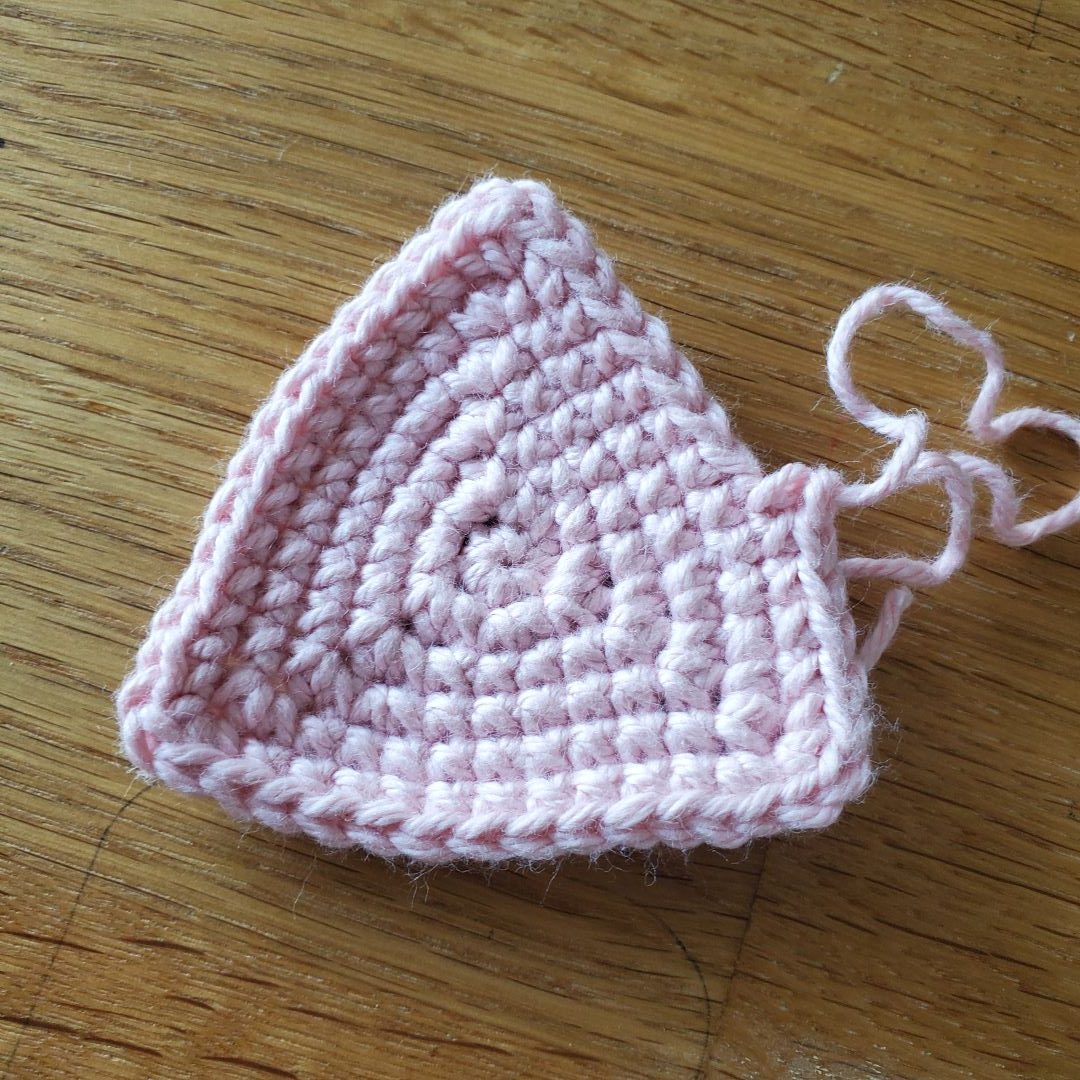
I also put in a ton of effort trying to make a flat equilateral triangle worked in rounds and came up with an acceptable result after a LOT of trial and error (see the pink triangle in the image and the template below). To be honest, this was probably way more work than necessary, but I really prefer the texture of crochet worked in the round, so I can see myself using this over the easier row-constructed triangles when designing for myself. (A question for future investigation: Could this pattern be adapted to make triangles that aren’t equilateral?)
As you will see, the overwhelming majority of this post covers triangles worked in rows.
Increasing or Decreasing?
Of the million-and-one triangles I crocheted in rows, I tried to determine whether there was a notable difference in the results if I increased versus decreased to create the shape. Ultimately, if there is a difference it is minimal. Personally, I found it easier to start with a long chain and decrease to a point than to start with a point and increase each round.
If you are VERY detail oriented, you might notice a textural difference between the increases and decreases, so this might be a factor in your choice. Personally, I think the decrease is pretty, but it is also probably slightly more noticeable.
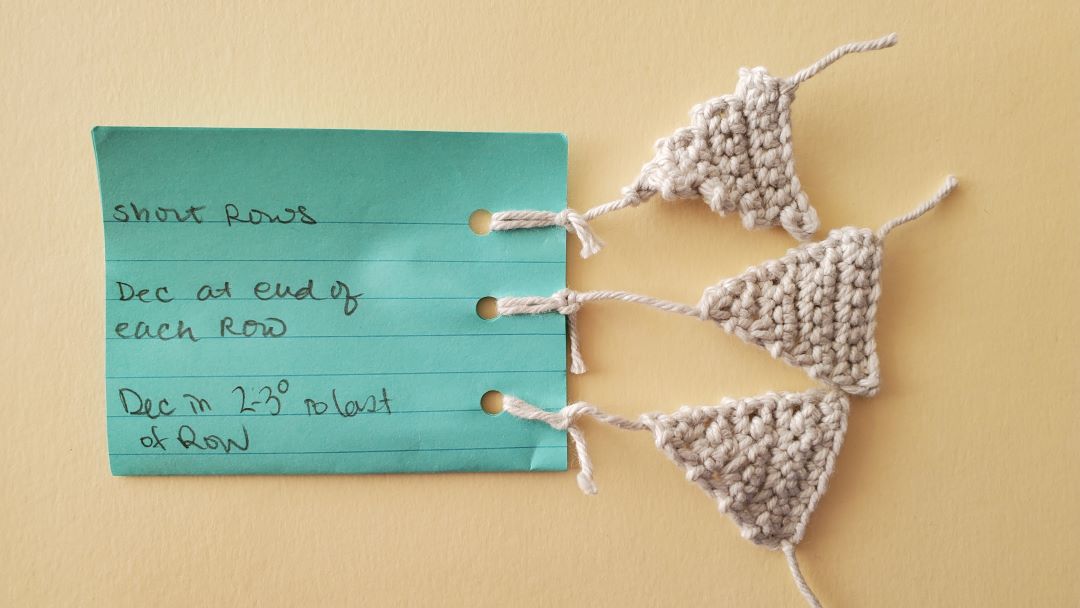
Triangles made with decreases
These triangles are worked from the base to the tip, shrinking with each row. Drum roll please… (from the top):
The first triangle is made with short rows rather than traditional decreases. In other words, I worked up to the last stitch of the row then turned the work. This creates a stairstep along the edge.
In this triangle I made a decrease over the last two stitches of each row. This created a smooth edge and preserved the flatness of the foundation chain.
In the third triangle, I decreased over the two sts BEFORE the last stitch of each row, thinking this might result in a tidier edge. It might have a slightly neater edge, but it also added a bit of curvature along the bottom of the triangle. This would probably be less noticeable when working a triangle with a larger base.
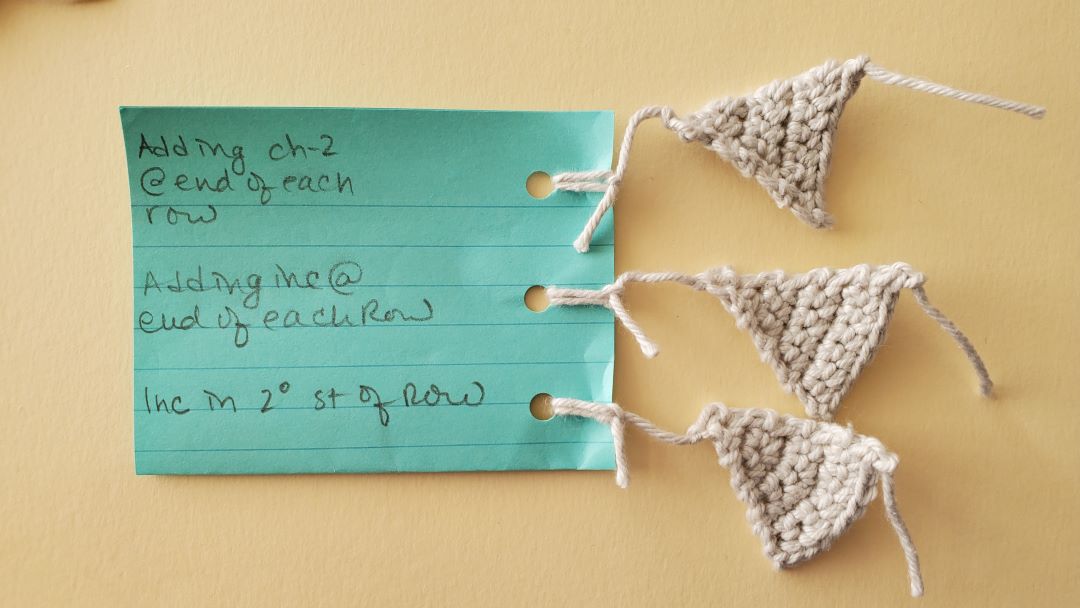
Triangles made with increases
These are worked from the tip down, expanding each row (from the top):
In the first triangle I “reversed” the short row concept. At the end of each row I chained 2, turned the work, and worked back across, starting in the second chain from the hook. I was pleasantly surprised by what a smooth edge this created, and I will definitely keep this in my back pocket for future pattern development.
In the second triangle I made a single increase in the last stitch of each row. This is very similar in result to the corresponding decrease version.
And finally, in the third I made the increase in the penultimate stitch of each triangle. Once again this produced a small amount of curvature in the base edge, but this would probably be negilible if working on a triangle with a larger base.
A final thought on the Increase v. Decrease discussion: Although I have a slight preference for working from the base up, there is one obvious perk for working from the point and increasing with each round—you don’t have to know the number of stitches your base will need at the start of crocheting.
Different types of [crochet] triangles
Let’s begin with a quick refresher on the basic types of triangles, not all of which are mutually exclusive.
First, there are scalene triangles whose sides are all different lengths and whose internal angles are likewise different (E).
Isosceles triangles have two sides of equal length (A, B, D). The opposing angles of the congruent sides are also the same.
Equilateral triangles are a special case of isosceles triangles whose sides and internal angles are ALL the same (A).
Right triangles are clearly the rockstars of the bunch, thanks to the Pythagorean Theorem (a² + b² = c²). They have exactly one internal angle measuring 90 degrees (B, C). Nerd Note: Since all the internal angles of a triangle HAVE TO add up to 180 degrees, it is impossible to have more than one right angle in a triangle—at least in Euclidean Geometry which is the only one I’ve studied…in middle school…almost 30 years ago.
Because I am a nerd and a perfectionist and wanted to be thorough, I dipped a toe into making each of these. We’ll start with equilateral and work our way to scalene.
NOTE: You may also have heard of acute and obtuse triangles. Acute triangles have no internal angles greater than 90 degrees (A,E), and obtuse triangles have one angle larger than 90 degrees (D). Equilaterals are always acute (all their internal angles are 60 degrees), isosceles and scalene can be either acute or obtuse, and right triangles are their own beast.
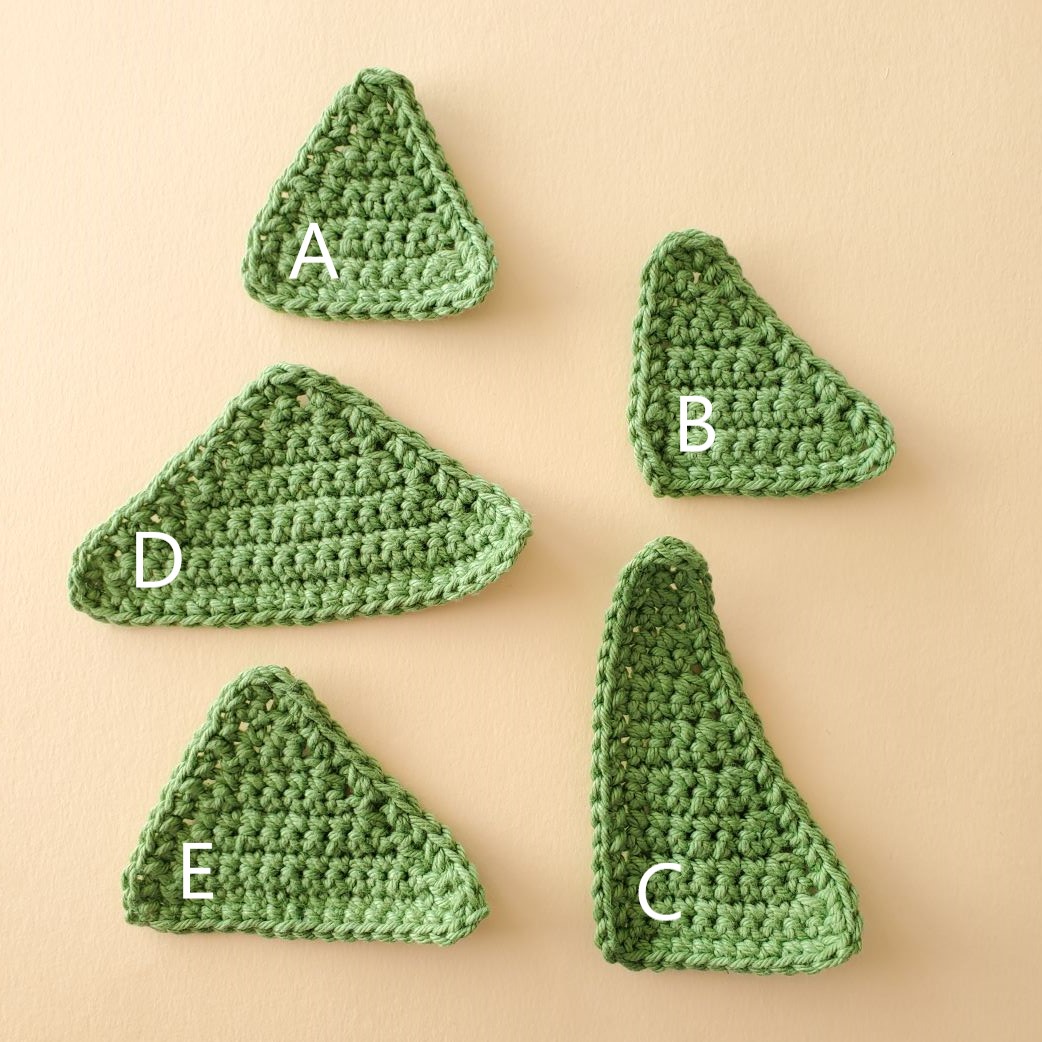
Note: I don’t love the raw edge left by working in rows of single crochet, so I did an edge of single crochets around these triangles.
Crocheting an Equilateral Triangle
If your goal is to crochet an equilateral triangle, sit down and buckle up. Things are about to get silly.
First thing’s first: I feel obliged to inform you that you can, in fact, quickly and easily crochet an acceptible approximation of an equilateral. When I started this quest I made a sample right off the bat that is good enough (start with a foundation chain of the number of stitches desired plus one, then decrease once at the end of each subsequent round). If you can live with “good enough”, fee free to skip ahead to the section on Right Triangles or the Easy Peasy Isosceles template down below.
Okay, now that I have winnowed you down to the die-hard nerds, let’s do the damn thing.
First, I am working with a 3mm hook and Dishie Worsted (specs here). When I crochet at my normal amigurumi tension my stitches are .45 cm wide and my rows are .45 cm high. This means the units I am measuring width and height with (sts/rows) are the same, and we don’t need to deal with unit conversions or fiddly measurements (what a huge math win!).
Equilateral Triangle Worked in Rows
As we mentioned above, by definition equilaterals have three congruent sides and three congruent angles. Therefore, the base (this will be the foundation chain and row 1 for us) and the diagonal edge of our work should be the same length (a). We don’t have direct control over the length of the edge of our triangle, so we need to pick a height (ie. the number of rows) that will result in the sides formed by the row edges being the same length as the base. We will call the number of rows we need to work b.
To find b we can employ the Pythagorean Theorem (you’re welcome) which tells us the relationship between the three sides of a right triangle. The theorem says that the the sum of the squares of the two shorter sides equals the square of the longest side (the hypotenuse) which is also the side across from the right angle. You have seen this written before as a² + b² = c² where c is the hypotenuse.
Right about now you may be thinking “ummm, but we are specifically NOT trying to make a right triangle right now.” And you would be right. But to take advantage of the theorem will will be clever and drop a vertical line from the apex to the base of our equilateral, in effect superimposing a right triangle on top of our equilateral whose height perfectly aligns with the equilateral’s. (We will not be proving why this is true today, folks, but it is).
Our new right triangle has a height b, base width a/2, and a hypotenuse a. Let’s plug those into the theorem and math the math! (Check out the graphic with the cutie triangle).
As you can see, the height (b) of an equilateral triangle is about 0.87a. Remember that we are measuring b in rows and a in sts, but fortunately those units are equivalent, so b rows = 0.87 x a sts.
Now let’s apply it. Let’s say I want an equilateral triangle with a base 10 sts wide, then I will need to make it b rows tall, where b is:
b = 0.87 x 10 sts = 8.7 rows
Well of course we cannot crochet .7 rows so we will round this up to 9 rows and we should end up with a pretty-dang-close to perfect equilateral.
What about a triangle with a base 30 sts wide? Same deal:
b rows = 0.87 x 30 sts = 26.1 rows which we will round down to 26 rows.
Now we know how to pick a height to match the width of our triangle’s base, but we still need to decide where to place our decreases in order to make this work. Let’s take the second example above to think through this.
Obviously, if we placed one decrease at the end of each row we would end up with a triangle of base 30 sts and a height of 30 rows, where row 30 is 1 st long. In order to make this triangle only 26 rows tall we need to sneak in 4 additional decreases. We can do this by making 4 rows where we begin and end the row with a dec (we will call these double decrease rows from here on). We need an algorithm for spreading the double decrease rows out evenly across our work so the triangle doesn’t get misshapen.
Equilateral Algorithm
STEP 1: Find a and b
a = # of sts in the base of the triangle
b = calculated ideal height in rows = .87a
STEP 2: Find c
This is the total # of decreases needed. Since we want the final row to have one stitch we don’t need to decrease a full a times.
c = a – 1
STEP 3: Find d
This is the # of rows available to make our decreases across. We do not make a decrease in the first row.
d = b – 1
STEP 4: Find e
This is gives us the number of double decrease rows we will need.
e = c – d
STEP 5: Find f
This tells us how often to make a double decrease row. In other words, make a double decrease in Row 2 then in every “f th” row until you have made a double decrease row e times.
f = d ÷ e
Example of how to use the algorithm for a triangle with a base of 30 sts. In this case, after making two decreases in Row 2, every 6th row would be a double decrease row until you have made 4 double decrease rows. The remaining rows all have a single decrease.
In this example, f has a remainder of 1 because the total number of rows isn’t perfectly divisible by the number of double decrease rows. This looks ugly in the math, but don’t worry. It simply means you’re final 6th row is a regular single decrease row rather than a double decrease row.
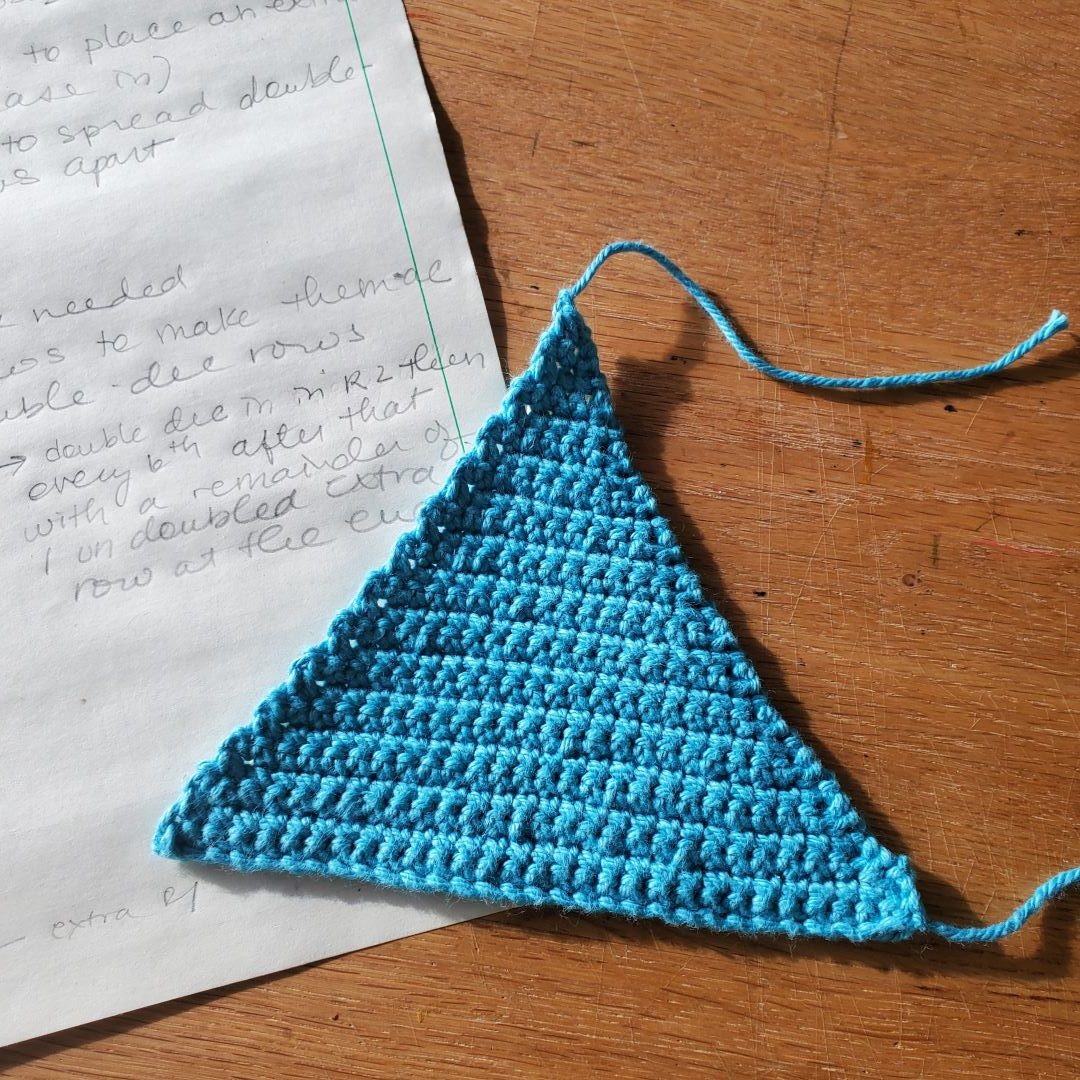
The resulting triangle is pictured below.
Woof! That was a bit exhausting! But ultimately you will have a very nice equilteral triangle to work with! check out the template below to get started making your own.
Basic Equilateral Template
Although this is a template you will need to employ the algorithm to adjust this to triangles whose base is a different size. This template is for a triangle with a 15 st base, and the answers to the steps of the algorithm are:
-
a = 15; b = 13; c = 14; d = 12; e = 2; f = 6
Row 1: Ch 16, sc 15 in BB starting with the 2nd ch from hook; ch 1, turn. [15 sts]
Row 2: Dec, sc 11, dec; ch 1, turn. [13 sts]
Row 3: Sc 11, dec; ch 1, turn. [12 sts]
Row 4: Sc 10, dec; ch 1, turn. [11 sts]
Row 5: Sc 9, dec; ch 1, turn. [10 sts]
Row 6: Sc 8, dec; ch 1, turn. [9 sts]
Row 7: Sc 7, dec; ch 1, turn. [8 sts]
Row 8: Dec, sc 4, dec; ch 1, turn. [6 sts]
Row 9: Sc 4, dec; ch 1, turn. [5 sts]
Row 10: Sc 3, dec; ch 1, turn. [4 sts]
Row 11: Sc 2, dec; ch 1, turn. [3 sts]
Row 12: Sc, dec; ch 1, turn. [2 sts]
Row 13: Dec. [1 sts]
Equilaterals in the round
As you will probably have guessed, I am not satisfied to call it good on equilateral triangles quite yet. As a shape that has three lines of symmetry emerging from a central point, the equilateral just FEELS like it was meant to be crocheted in the round. Sadly, it isn’t easy to get a flat triangle in the round without resorting to some fiddly increasing, but—as you know—I am here for the excrutiating minutiae.
In our investigation of circles we discussed that the flatness of our crocheted circles had to do with the rate at which the radius and circumference were changing with respect to each other. Something similar is happening here, but it is made significantly more complicated by the fact that we don’t have a consistent “radius” (the distance from the center to a vertex of the triangle is significantly longer than to the middle of a side). Frankly, I don’t have the chops or the energy to math this one out for y’all, but I did have a little fun with trial and error.
Increasing by 6
I first decided the points of the triangle could be formed by stacking hdc on top of each other every round, and that it would be easiest to prevent this stacking from shifting by making 3 stitch increases rather than regular increases (ie 2 sc made in the same stitch).
Since increasing by 6 each round produces a relatively flat circle, this seemed like a decent place to start or our equilateral, and I began the investigation with the following:
Rnd 1: MR, sc 6. [6 sts]
Rnd 2: *Sc, (sc, hdc, sc) in next* x 3. [12 sts]
Rnd 3: *Sc 2, (sc, hdc, sc) in next, sc* x 3. [18 sts]
Rnd 4: *Sc 3, (sc, hdc, sc) in next, sc 2* x 3. [24 sts]
Rnd 5: *Sc 4, (sc, hdc, sc) in next, sc 3* x 3. [30 sts]
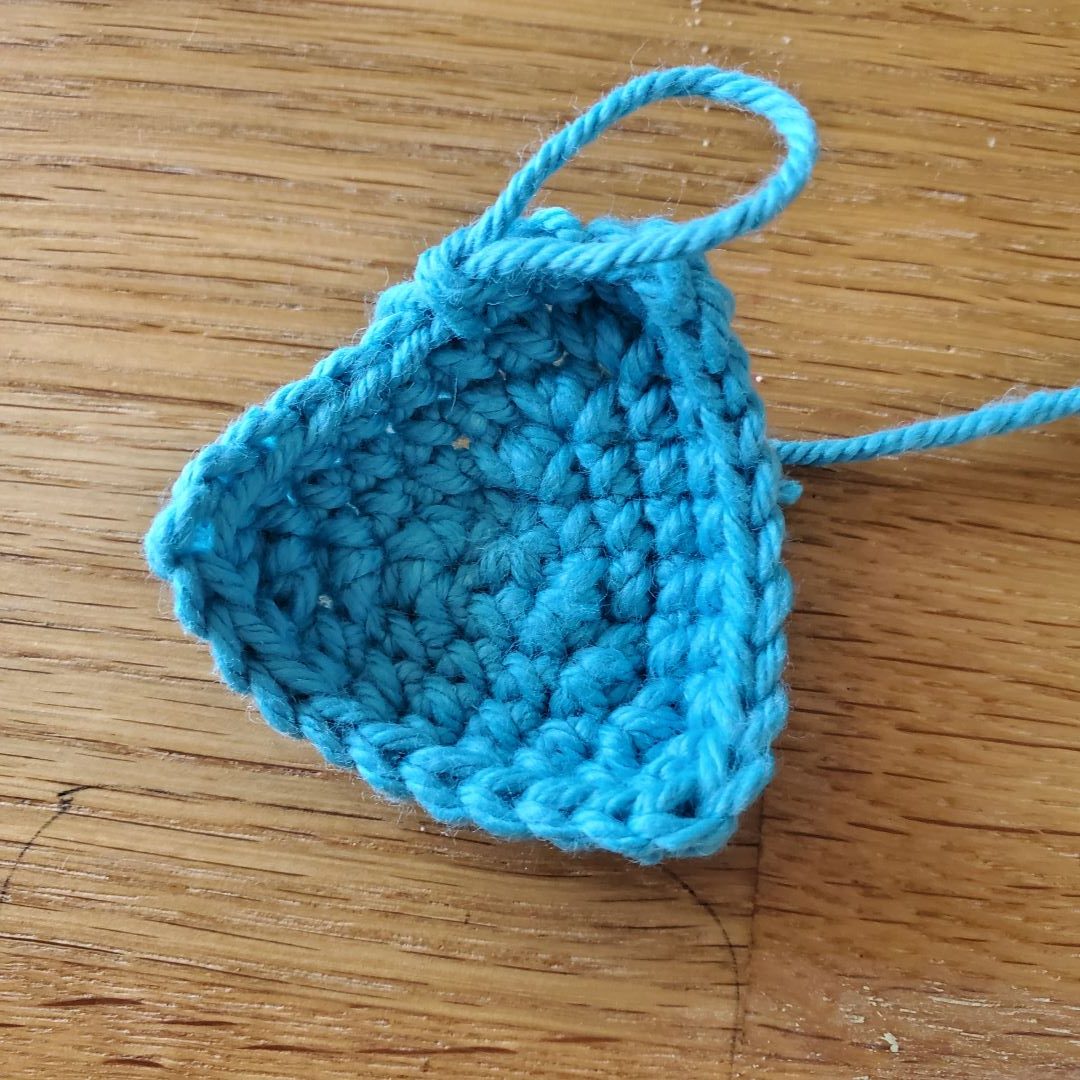
By the end of the fifth round it was very clear that the corners of my triangle were curving inward, a sign that the area of my triangle was increasing faster than the perimeter.
What’s happening in this picture: The corners of the triangle are curling up like a cup, suggesting the perimeter of the shape isn’t growing as fast as its area.
Increasing by 9
Unfortunately, to maintian the symmetry of the shape I could ony increase by multiples of 3, so my next attempt was a triangle made with 9 increases each round:
Rnd 1: MR, sc 6. [6 sts]
Rnd 2: *Inc, (sc, hdc, sc) in next st*x 3. [15 sts]
Rnd 3: *Sc 3, (sc, hdc, sc) in next st, inc* x 3. [24 sts]
Rnd 4: *Sc 3, inc, (sc, hdc, sc) in next, sc 3* x 3. [30 sts]
Rnd 5: *Sc 6, (sc, hdc, sc) in next, inc, sc3* x 3. [39 sts]
By Rnd 5 this shape was starting to get ripply. As we discussed in the circle post, this is a good indication the perimeter’s growth was outpacing the area’s. Blarghhhh! Time to get REALLY persnickety.
On top of this, in order to prevent to much curvature on the sides of the triangle I had to alternate the placement of the extra increase of the pattern repeats T^T
Alternating
So what happens if we alternate the number of increases in every other rnd (ie, 6 inc, 9 inc, 6 inc…)? We will effectively be averaging the amount of increases out over the rnds. Note that I am still alternating placement of the extra increases in the 9-increase rounds (*sighs deeply and pitifully*).
Rnd 1: MR, sc 6.[6 sts]
Rnd 2: *Inc, (sc, hdc, sc) in next st* x 3. [15 sts]
Rnd 3: *Sc 3, (sc, hdc, sc) in next st, sc* x 3. [21 sts]
Rnd 4: *Sc 4, (sc, hdc, sc) in next st, inc, sc* x 3. [30 sts]
Rnd 5: *Sc 5, (sc, hdc, sc) in next st, sc 4* x 3. [36 sts]
Rnd 6: *Sc 5, inc, (sc, hdc, sc) in next st, sc 5* x 3. [45 sts]
This certainly produced the best result, but it was difficult to keep track of all the alternating components. I highly recommend marking your rounds if you decide to try it out.
Note: To scale this template up, continue alternating between increase 6 and increase 9 rows. Don’t forget to alternate between placing the additional “inc” of the 9-increase rnds in the stitch before/after the “(sc, hdc, sc)” to prevent weird humps on the sides of the triangle.
Right Triangles
Right triangles are very easy when worked in rows. Start with the desired base size, mark one edge of your triangle to be the “decrease side”. Then place decreases at the beginning or end of rows but ONLY on the marked side.
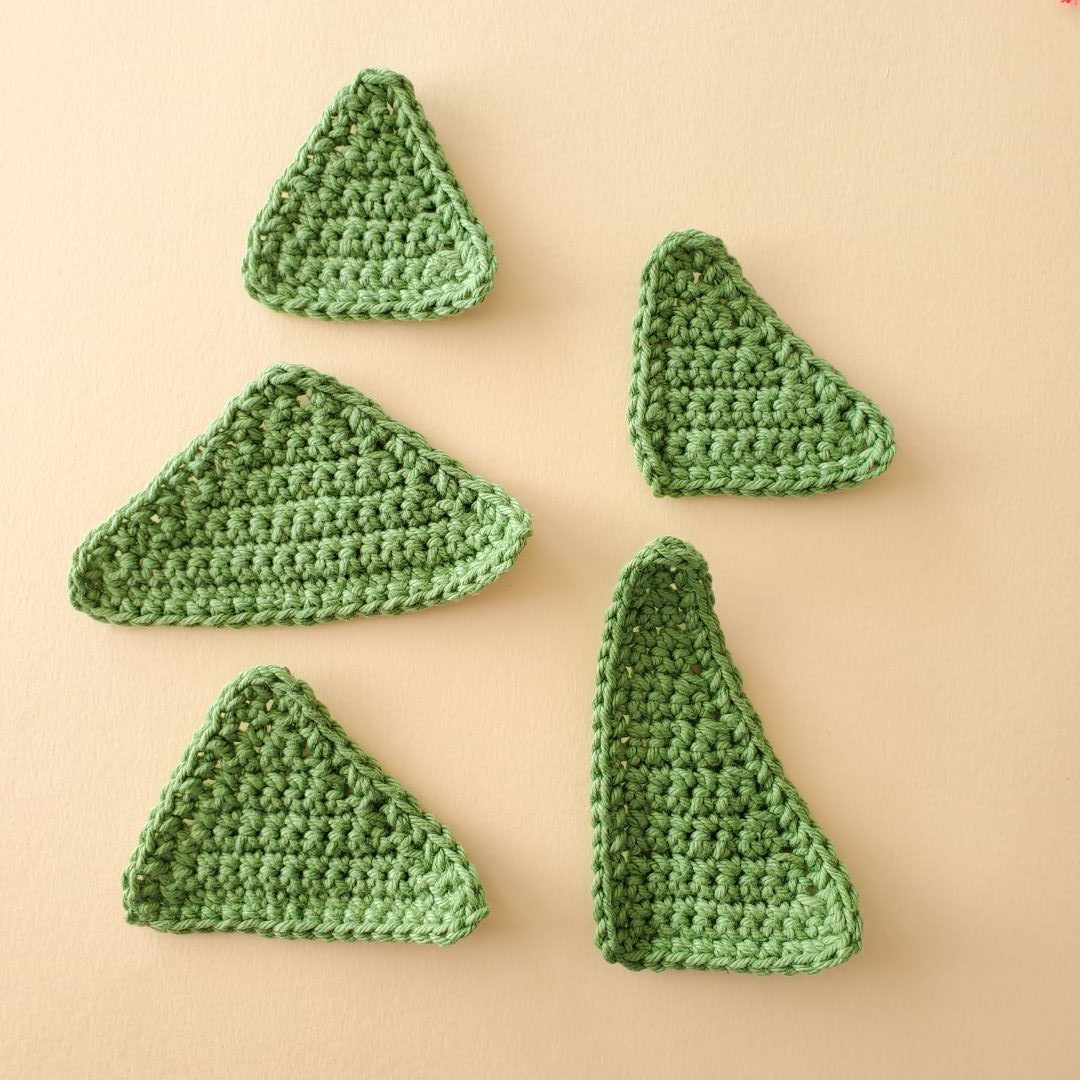
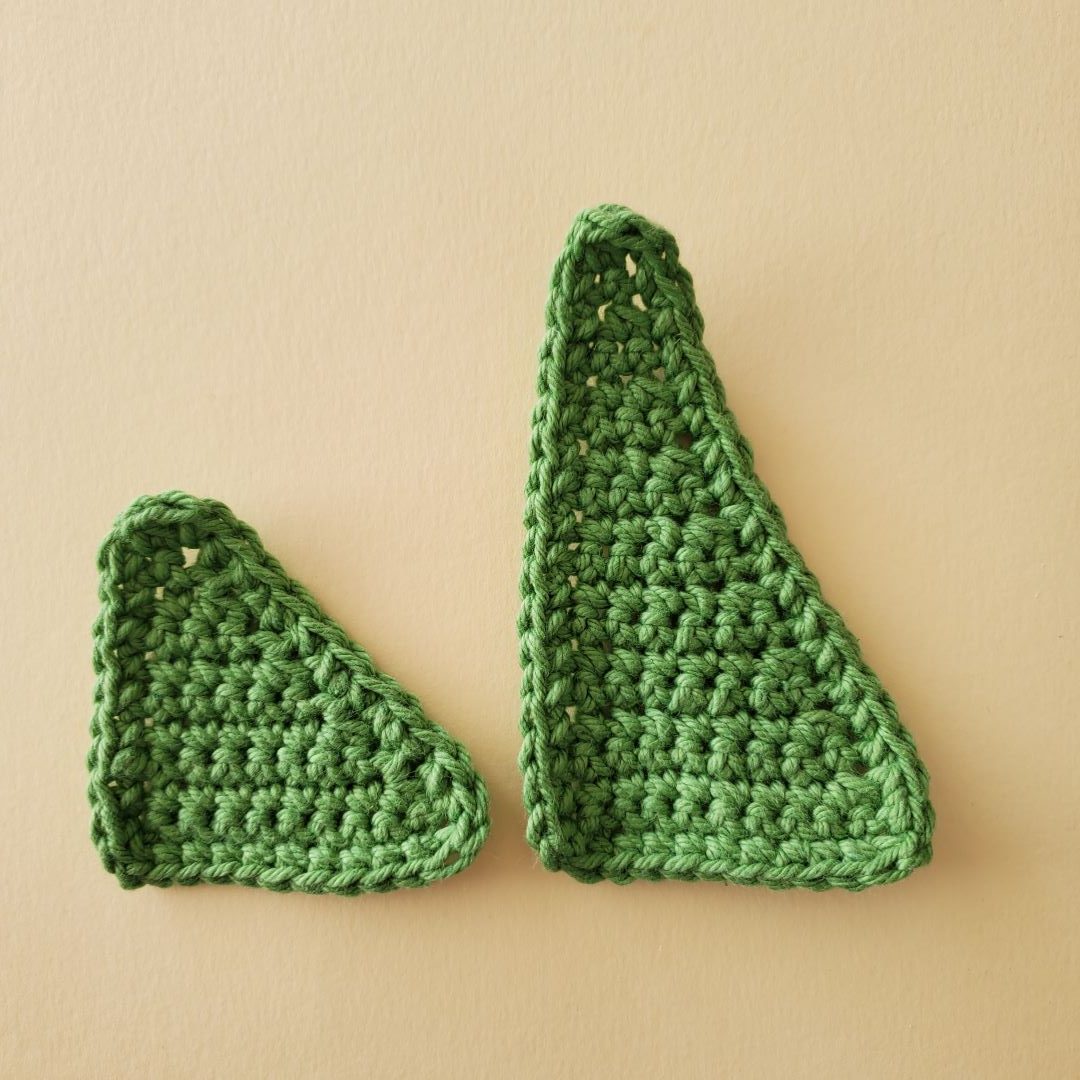
If you want to play with the slope of the decrease edge, simply decide how many decreases you will make over a certain number of rows (you are making a tangible example of the slope (m) you learned about in Algebra class: m = rise/run). For example, the triangle at the left of the image has a decrease in each row (m = 1/1 = 1). The one on the right has a decrease every other row (m = 2/1 = 2). You can imagine how tall and skinny the triangle would be if you only did a decrease every third or fourth row!
Right Triangle Template
Row 1: Ch 11, sc 10 in BB starting with 2nd ch from hook; ch 1, turn. [10 st]
Row 2: Sc 8, dec; ch 1, turn. [9 sts]
Row 3: Dec, sc 7; ch 1, turn. [8 sts]
Row 4: Sc 6, dec; ch 1, turn. [7 sts]
Row 5; Dec, sc 5; ch 1, turn. [6 sts]
Row 6: Sc 4, dec; ch 1, turn. [5 sts]
Row 7: Dec, sc 3; ch 1, turn. [4 sts]
Row 8; Sc 2, dec; ch 1, turn. [3 sts]
Row 9: Dec, sc; ch 1, turn. [2 sts]
Row 10: Dec. Fasten off.
This template produces a right triangle whose base and height are the same size. You can scale this up or down by changing the length of the starting chain (the desired number of st in the base plus 1), then decreasing once each row, alternating between the beginning and end of the row.
Note: You can certainly get more complicated with this shape if the proportions of these templates aren’t doing it for you. For example, you may want a triangle whose base is 2/3 its height. You could do this by making two decrease for every three rows, which will require being very attentive about which side of your triangle you make the decreases on.
Right Triangle Template: Long and Lean Version
Row 1: Ch 11, sc 10 in BB starting with 2nd ch from hook; ch 1, turn. [10 st]
Row 2: Sc 8, dec; ch 1, turn. [9 sts]
Row 3: Sc 9; ch 1, turn. [9 sts]
Row 4: Sc 7, dec; ch 1, turn. [8 sts]
Row 5; Sc 8; ch 1, turn. [8 sts]
Row 6: Sc 6, dec; ch 1, turn. [7 sts]
Row 7: Sc 7; ch 1, turn. [7 sts]
Row 8; Sc 5, dec; ch 1, turn. [6 sts]
Row 9: Sc 6; ch 1, turn. [6 sts]
Row 10: Sc 4, dec; ch 1, turn. [5 sts]
Row 11: Sc 5; ch 1, turn. [5 sts]
Row 12: Sc 3, dec; ch 1, turn. [4 sts]
Row 13: Sc 4, ch 1, turn. [4 sts]
Row 14: Sc 2, dec; ch 1, turn. [3 sts]
Row 15: Sc, dec; ch 1, turn; [2 sts]
Row 16: Sc 2; ch 1, turn. [2 sts]
Row 17: Dec; ch 1, turn. [1 st]
Row 18: Sc. Fasten off.
This template produces a right triangle whose base is about half its height. You can scale this up or down by changing the length of the starting chain (the desired number of st in the base plus 1), then decreasing every other row on the same side of the triangle. We highly recommend marking the decrease side for the first few rows before the slope becomes obvious.
Short and Squat Isosceles Triangle Template
Row 1: Ch 21, sc 20 in BB starting with 2nd ch from hook; ch 1, turn. [20 sts]
Row 2: Dec, sc 16, dec; ch 1, turn. [18 sts]
Row 3: Dec, sc 14, dec; ch 1, turn. [16 sts]
Row 4: Dec, sc 12, dec; ch 1, turn. [14 sts]
Row 5: Dec, sc 10, dec; ch 1, turn. [12sts]
Row 6: Dec, sc 8, dec; ch 1, turn. [10 sts]
Row 7: Dec, sc 6, dec; ch 1, turn. [8 sts]
Row 8: Dec, sc 4, dec; ch 1, turn. [6 sts]
Row 9: Dec, sc 2, dec; ch 1, turn. [4 sts]
Row 10: Dec x 2; ch 1, turn. [2 sts]
Row 11: Dec. Fasten off.
This template is very easy to scale since the basic instruction is simply to decrease at either end of each row. Simply start with a foundation ch the desired length of the base plus 1, then have at it.
Isosceles Triangles
Isosceles triangles are also easy to crochet in rows. All you need to do is make sure you are decreasing the same amount on the left and right sides of your triangle. The example in the pic has decreases at the beginning and end of each row. This creates a shallow slope and a triangle that is relatively wide compared to it’s height.
Alternately, you could make a decrease only at the end of each row (see the Easy Peasy Template below) and you would end up with a triangle whose base and height are relatively equivalent. You could even spread the the decreases out across more rows as long as you are careful to stagger them equally between the right and left edges. This would make a tall pointy triangle.
Easy Peasy Isosceles Template
Row 1: Ch 11, sc 10 in BB starting with 2nd ch from hook; ch 1, turn. [10 st] Row 2: Sc 8, dec; ch 1, turn. [9 sts] Row 3: Sc 7, dec; ch 1, turn. [8 sts] Row 4: Sc 6, dec; ch 1, turn. [7 sts] Row 5; Sc 5, dec; ch 1, turn. [6 sts] Row 6: Sc 4, dec; ch 1, turn. [5 sts] Row 7: Sc 3, dec; ch 1, turn. [4 sts] Row 8; Sc 2, dec; ch 1, turn. [3 sts] Row 9: Sc, dec; ch 1, turn. [2 sts] Row 10: Dec. Fasten off. This isosceles has a base whose length is the same as its height. Although it is technically not an equilateral it is probably close enough for most purposes. This template is super easy to scale, so have fun!Scalene Triangles
We will wrap this discussion up by talking about scalene triangles. This is a wildly broad category as it only means that the three sides of the triangle are unique. They can be acute, obtuse, or right, so there isn’t one approach that will capture the wide variety of scalenes you might want to make.
Sadly, this means inventing something new for each shape. If you are looking for a scalene right, you can base it on the right triangle templates above, but make sure to decrease at a rate that results in a different base and height.
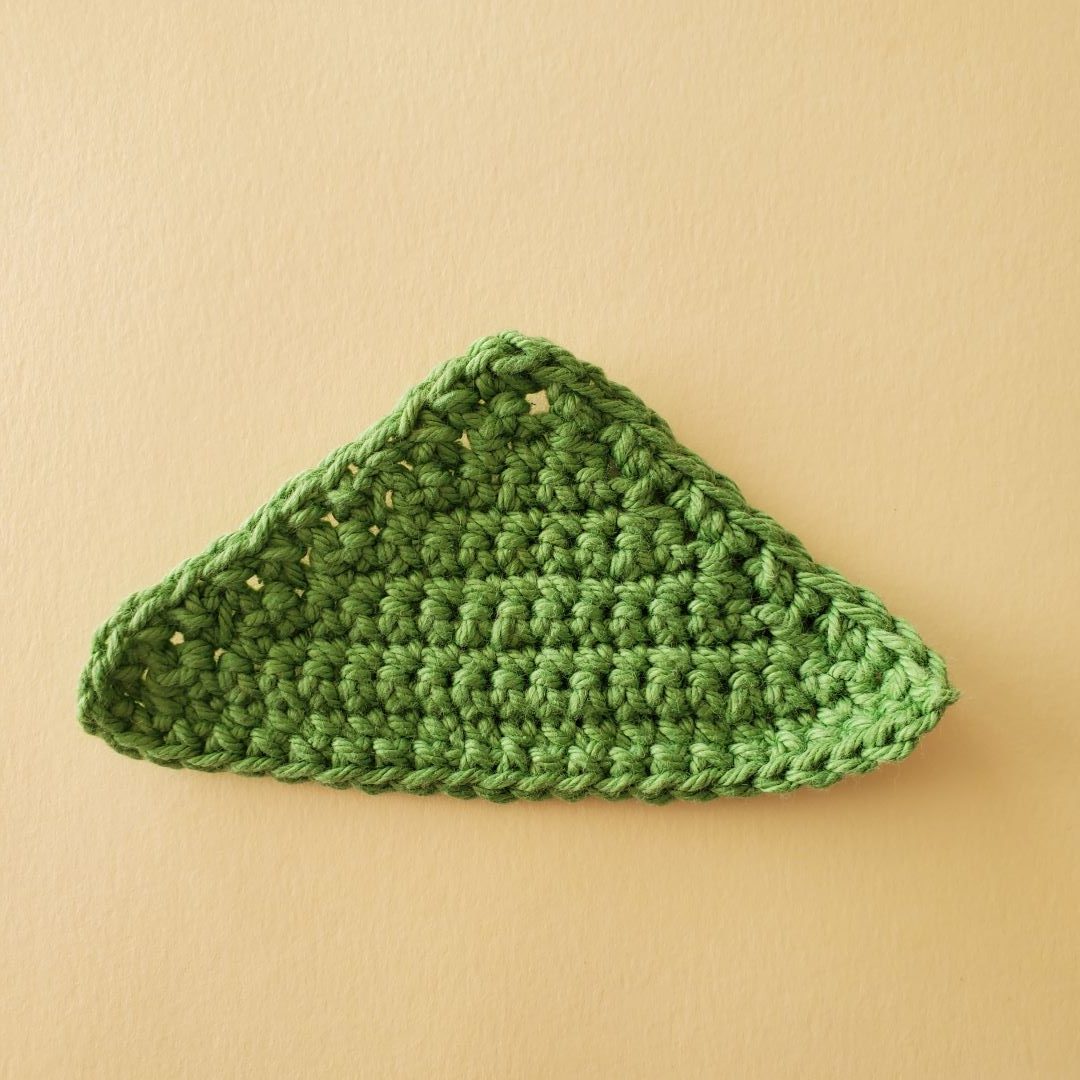
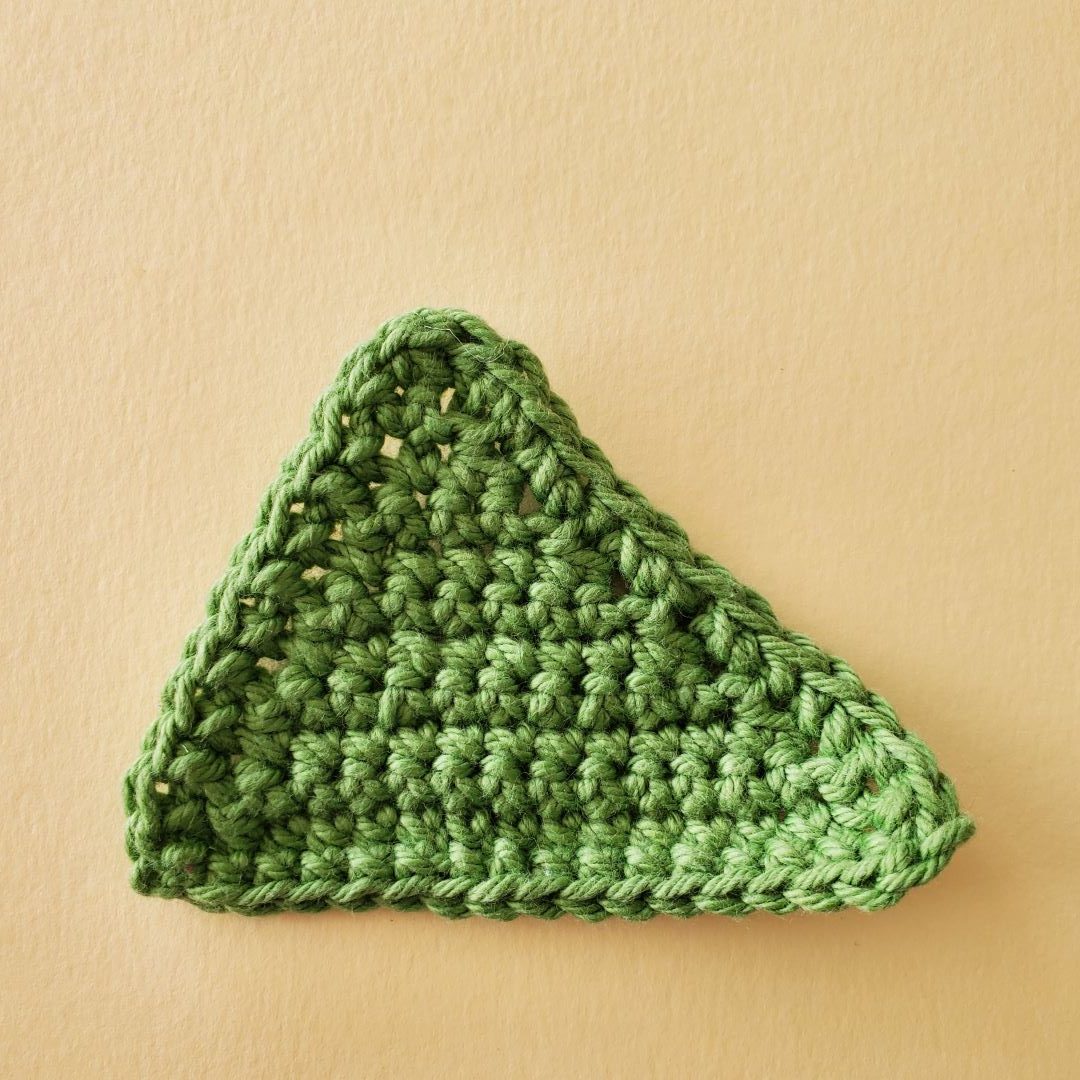
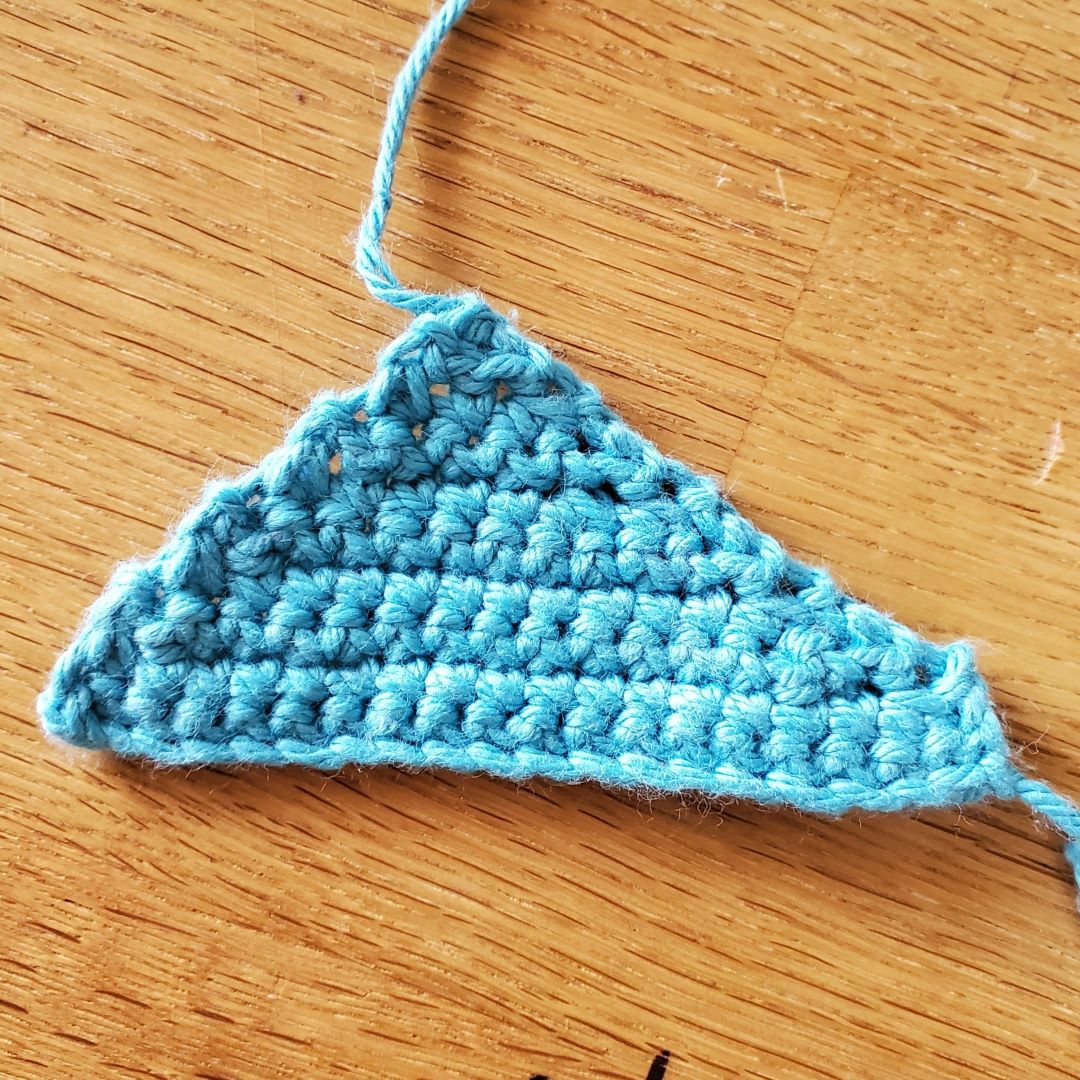
If you want an acute or obtuse scalene you can start with a base of the desired size and decrease at different rates on either side of the shape (as in the green triangle pictured). Note: Because the two base vertices are acute, the only way you will get an obtuse triangle is if your top vertex is obtuse. In order to do this at least one of the two angles at the base will have to decrease quite rapidly (mathematically these 2 angles must total less than 90 degrees). This is a bit complicated, as it means decreasing more than once per side, which tends to cause a bit of curvature along the base of the triangle.
What’s going on in this picture:
This triangle decreases once on the left each row and twice on the right every third row. You can see the base has a bit of curvature on the right side. Even with so many decreases the top corner is only barely obtuse!
Clockwise from the top: Right, acute, and obtuse scalene triangles.
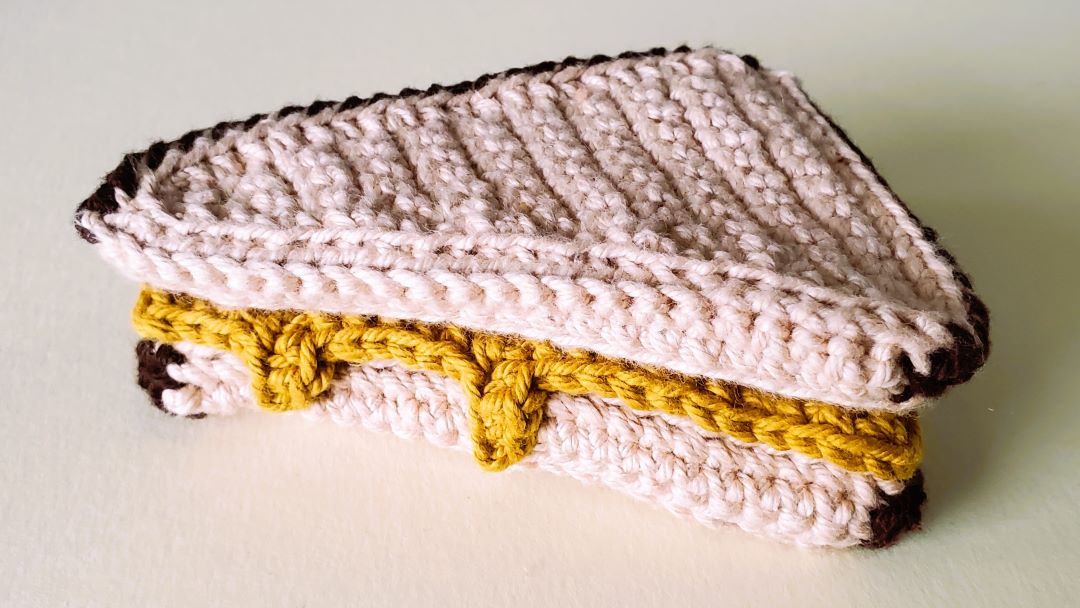
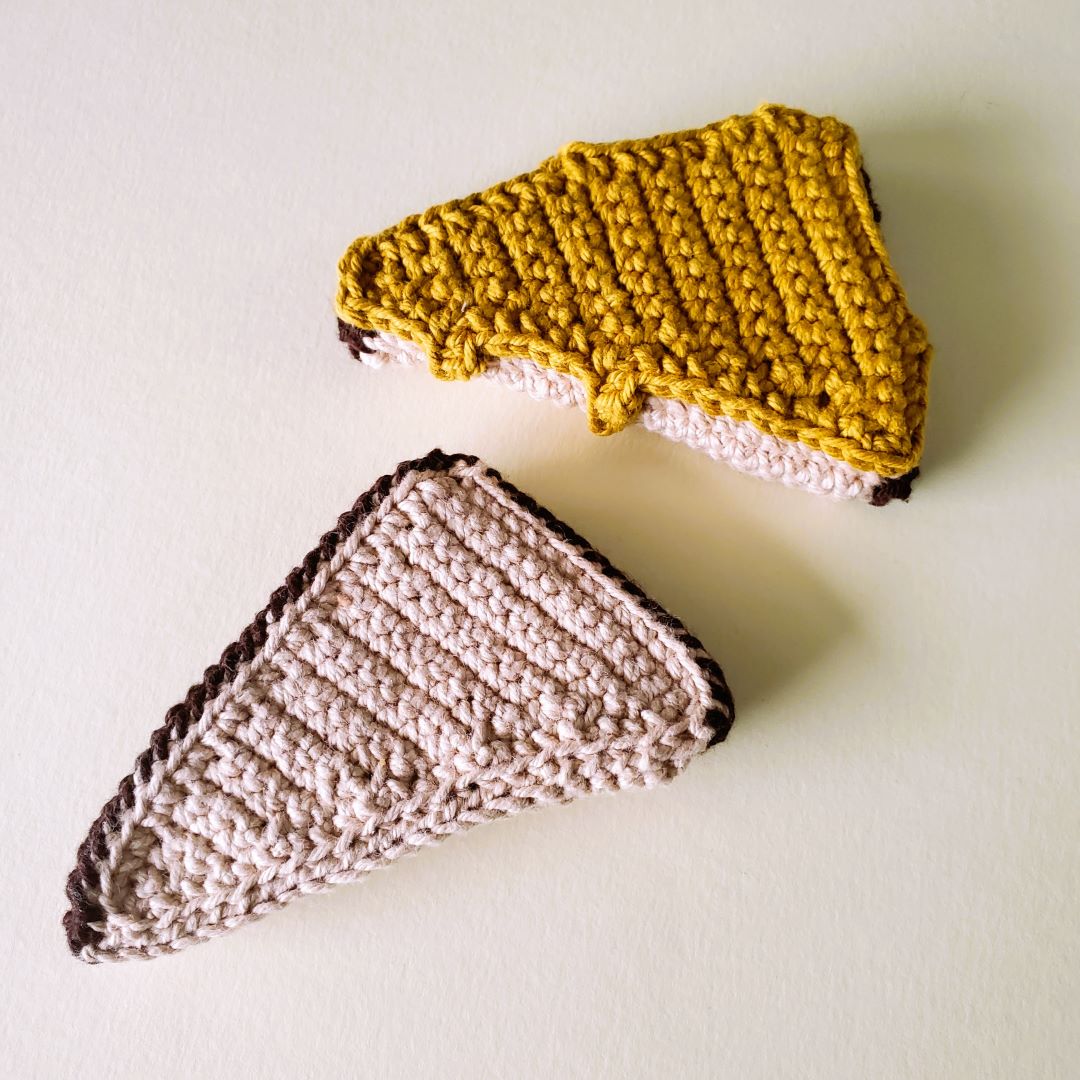
There is certainly more exploration to do in the subject of scalene triangles, but my brain is already frizzled by this post, so perhaps e can revisit them in the future. In the meantime, get a little practice in with this post’s free pattern: Grilled Cheese Sandwich.
Grilled Cheese Sandwich Pattern
Here’s your quick freebie to practice all that triangle making. (And you’re in luck, I am not forcing any equilaterals on you🤣)
Ingredients:
- 3mm crochet hook
- Stuffing
- Tapestry needle
- Worsted, light worsted, or aran yarn in:
- Color A – bread color
- Color B – crust color
- Color c – cheese color
The Bread Top (x 2 for each slice)
Row 1: Ch 15, sc 14 in BB; ch 1, turn. [14 sts]
Row 2: Sc 12, dec; ch 1, turn. [13 sts]
Row 3: Dec, sc 11; ch 1, turn. [12 sts]
Row 4: Sc 12; ch 1, turn.
Row 5: Dec, sc 10; ch 1, turn. [11 sts]
Row 6: Sc 9, dec; ch 1, turn. [10 sts]
Row 7: Sc 10; ch 1, turn.
Row 8: Sc 8, dec; ch 1, turn. [9 sts]
Row 9: Dec, sc 7; ch 1, turn. [8 sts]
Row 10: Sc 8; ch 1, turn.
Row 11: Dec, sc 6; ch 1, turn. [7 sts]
Row 12: Sc 5, dec; ch 1, turn. [6 sts]
Row 13: Sc 6; ch 1, turn.
Row 14: Sc 4, dec; ch 1, turn. [5 sts]
Row 15: Dec, sc 3; ch 1, turn. [4 sts]
Row 16: Sc 4; ch 1, turn.
Row 17: Dec, sc 2; ch 1, turn. [3 sts]
Row 18: Sc, dec; ch 1, turn. [2 sts]
Row 19: Sc 2; ch 1, turn.
Row 20: Dec; ch 1, turn. [1 sts]
Row 21: Sc 1; ch 1 but do not turn.
Rotate the work and sc 20 along the edge of the work, ch 2 and rotate the work, sc 14 along the top of the foundation ch, ch 2 and rotate the work, sc 21 along the final edge, then slip stitch at the tip and fasten off.
Assembling the bread
Complete assembly instructions to join two bread tops per slice of bread.
Part 1 Assembly
Row 1: Join Color A into the BLO of the st at the corner of the hypotenuse of one bread top, then sc 22 in BLO; ch 1, turn.
Row 2: Sc 22. Fasten off and leave a long tail for sewing.
Part 2 Assembly (Crust)
Row 1: Join Color B into BLO of the st at the corner of the hypotenuse and sc into each st around to the two remaining sides; ch 1 turn.
Row 2: Sc in in each st. Fasten off and leave a tail for sewing.
Pin another Bread top and use the Color A and B yarn tails to sew the corresponding edges together, stuffing lightly before sealing.
Tip: We used triangular pieces of felt rather than stuffing to fill our bread slices.
Cheese Slice
With Color C repeat Rows 1-21 of Bread Top instructions. Don’t break the yarn after the ch-1. Instead, rotate the work and continue with the following instructions.
Edge 1: Sc 4, ch 3 then sc 2 in BB, sc 6, ch 4 then sc 3 in BB, sc 11; ch 2 and rotate the work.
Edge 2: Sc 4, ch 3 then sc 2 in BB, sc 10 into the edge; ch 2 then rotate the work.
Edge 3: sc 3, ch 4 then sc 3 in BB, sc 8, ch 3 then sc 2 in BB, sc 8. Sl st, fasten off. Use one tail to tack the cheese to one slice of bread, including the drips.
Abbreviations and Terms
single crochet (sc)
decrease (dec)
chain (ch)
slip stitch (sl st)
work into the bumps on the back of the chain starting with the second ch from the hook (sc in BB)
For help with any of these sts or techniques check out our Crochet 101 blog posts.
We did it!!!!! That is it for our investigation of triangles. I didn’t expect it to be such a huge chore, and I will be quite thankful to move onto the next shape in this series (Ge-Ami-try for Beginners: Life in 2D). God willing the muse of crochet-blogging will go a little easier on me with that one🤣🤣🤣
As always, please drop us a note if you have any questions or thoughts about the topic, templates, or free pattern. We’d love to hear from you!

Written by Freddy
Related Articles
Guadalajara Getaway: Art, Tacos, Tequila & Crochet Chaos!
Hola, fiber fanatics! If you’ve been following my adventures, you know I finally took a much-needed vacay to Guadalajara, Mexico—and let me tell...
Week 2: Useful Crochet Techniques
Hello! So glad to see you again. By now you have had several weeks to try out all the basic stitches we covered in our last blogpost (ch, sl st, sc,...
Stitch… you basic! (Basic Crochet Stitches)
In this first installment of Crochet 101, we are introducing you to the very most common building blocks of the craft: the basic crochet stitches....





Mind Blown!!!