Week 1: Cirque du Crochet, the crochet circle
Written by Freddy
It all begins with a circle.
The vast majority of amigurumi patterns start with a circle of some kind, so what better way to leap into Ge-Ami-try than a deep dive into the craft’s favorite shape. If you are near your hook, grab a pretty yarn and work along with us as we explore.
It all truly begins with a Magic Ring, a technique that often leaves newbies in fits. If you are such a crocheter, feel free to chain 2 and work into the second chain instead. Now make 6 single crochets into the magic ring (or second chain) and choose your own adventure below!
Is this LOVE?!?
Make a Magic Ring!
Most amigurumi circles start with a magic ring—a great foundation for a circle. Here’s a quick tutorial if you haven’t made one before.

Nōlī turbāre circulōs meōs!” —Archimedes
/”Don’t f#$% with my circles!”/
Making Crochet Circles: Spirals v. Joined Rounds
Spirals or “Continuous Rounds”
If you are like most of us, you will opt to work in spirals or “continuous rounds.” By this we mean that, after completing a round, there is no need to make a slip stitch or chain 1 into the first stitch of the new round.
If you are working along with us, make an increase in each of the 6 single crochets you have already made. (Pro tip: Use a scrap of contrasting yarn to mark where this round ends. The hardest part of working in continuous rounds is losing track of the where they end!)
Although continuous rounds don’t produce true circles, they are a close approximation and give our pieces a nice seamless appearance. (Imo, they are also a bit easier to work with than joined rounds). However, joined rounds are great when you are working flat and want a very “circle-y” circle.
Joined Rounds
Sometimes you WILL want to work in joined rounds, and if you chose this path I applaud your gumption! When making joined rounds, after completing your last stitch, slip stitch into the first stitch of the round and chain one. The chain one adds height to your work to begin the new round. you will ignore the slip stitch all together when you work back around to it.
If you chose to make joined rounds, slip stitch into the first of the 6 single crochets you made into the magic ring, chain 1, then make an increase in the same stitch. Now make 5 more increases around, slip stitch into the top of the first increase and chain 1. (The slip stitch and chain 1 prep you for the next round).
What’s going on in this pic?
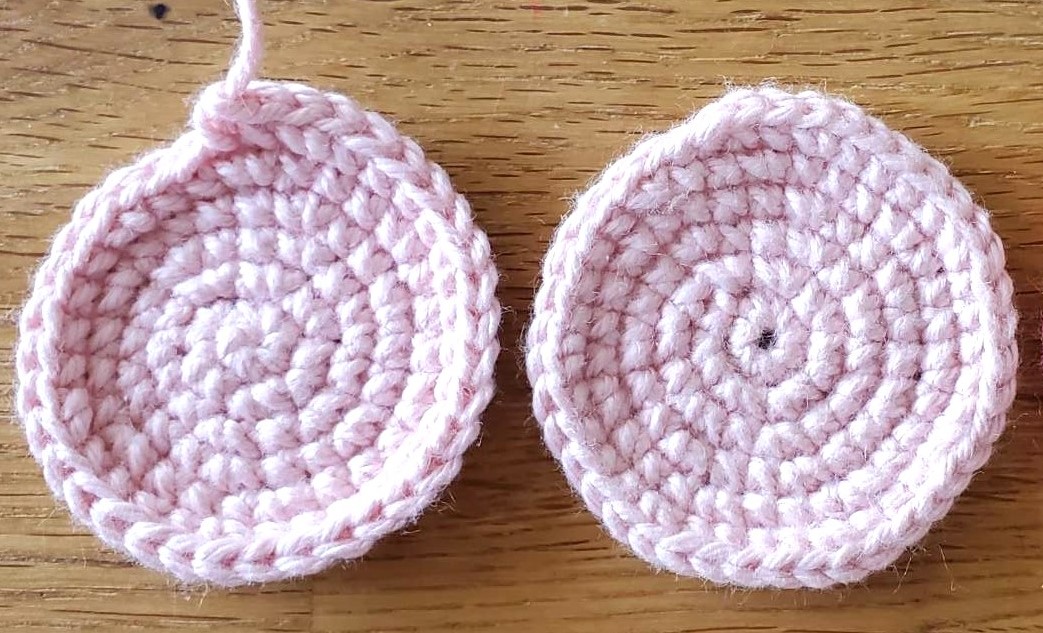
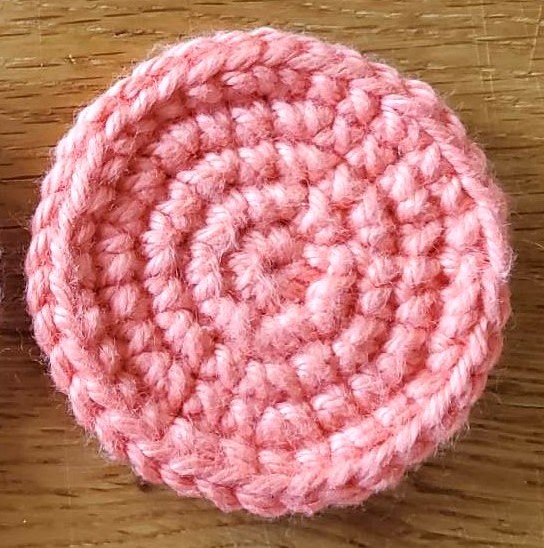
On the left: A crochet circle worked in sprials (continuous rounds).
On the right: A crochet circle worked in spirals fastened off with an invisbile join. Note the slight bump resulting from the fasten off.
What’s going on in this pic?
A crochet circle made with joined rounds. This is almost a perfect circle. If you look closely you might see a faint ridge created by the slip st and chain 1 between each round (in the 3 o’clock position).
Making Crochet Circles: Staggered increases v. stacked increases
Where should I put my increases to make the best crochet circle?
You have one more huge decision to make: where will you put your increases?!? If you plan to make a circle, the increases should be evenly spaced across the round, but where exactly? Amongst ami designers there seem to be two schools of thought: stick ‘em all in the last stitch of the pattern repeat every round OR stagger their position from round to round.

Stacking your Increases
By “stacking increases” we mean putting all of your increases in the same place every round. When patterns employ this method, you typically find the increase in the last stitch of each pattern repeat.
Here’s the example:
Rnd 3: *Sc, inc* x 6.
Rnd 4: *Sc 2, inc* x 6.
Rnd 5: *Sc 3, inc* x 6.
I will NOT be dogging on this method. Some of the world’s most excellent, talented, and creative designers use it all the time. Also, life is short and this is quick and easy. If you choose this path your results will be just fine.
However, there are a couple of small downsides. First, after a few rounds, the circle begins to look a bit more like a polygon, with flatter sides between the increases. Second, when you look at the texture of the work, the increases are quite noticeable. That is only a downside if you find that textural effect distracting. Personally, I think it can be really pretty.
If you chose this path, add rounds 3-5 (above) to your started work. If you are working in joined rounds, don’t forget the slip stitch and chain 1 at the start of each subsequent round.
Staggering your increases
This method involves a bit more mental math, but it yields a rounder circle. We use it almost exclusively in Freddy Goat patterns because I am very, VERY uptight. It involves changing the placement of your increase every round. Most designers do this by bouncing from the last stitch of the pattern repeat to the center stitch of the repeat in each subsequent round, like so:
Rnd 3: *Sc, inc* x 6.
Rnd 4: *Sc, inc, sc* x 6.
Rnd 5: *Sc 3, inc* x 6.
(Many years ago, for whatever dumb reason, I decided to add even more complexity to this and alternate between the first and last stitch of the pattern repeats on odd number rounds. I am a glutton for punishment.)
If you choose this path, add rounds 3-5 to your started work. If you are working in joined rounds, don’t forget the slip stitch and chain 1 at the start of each subsequent round.
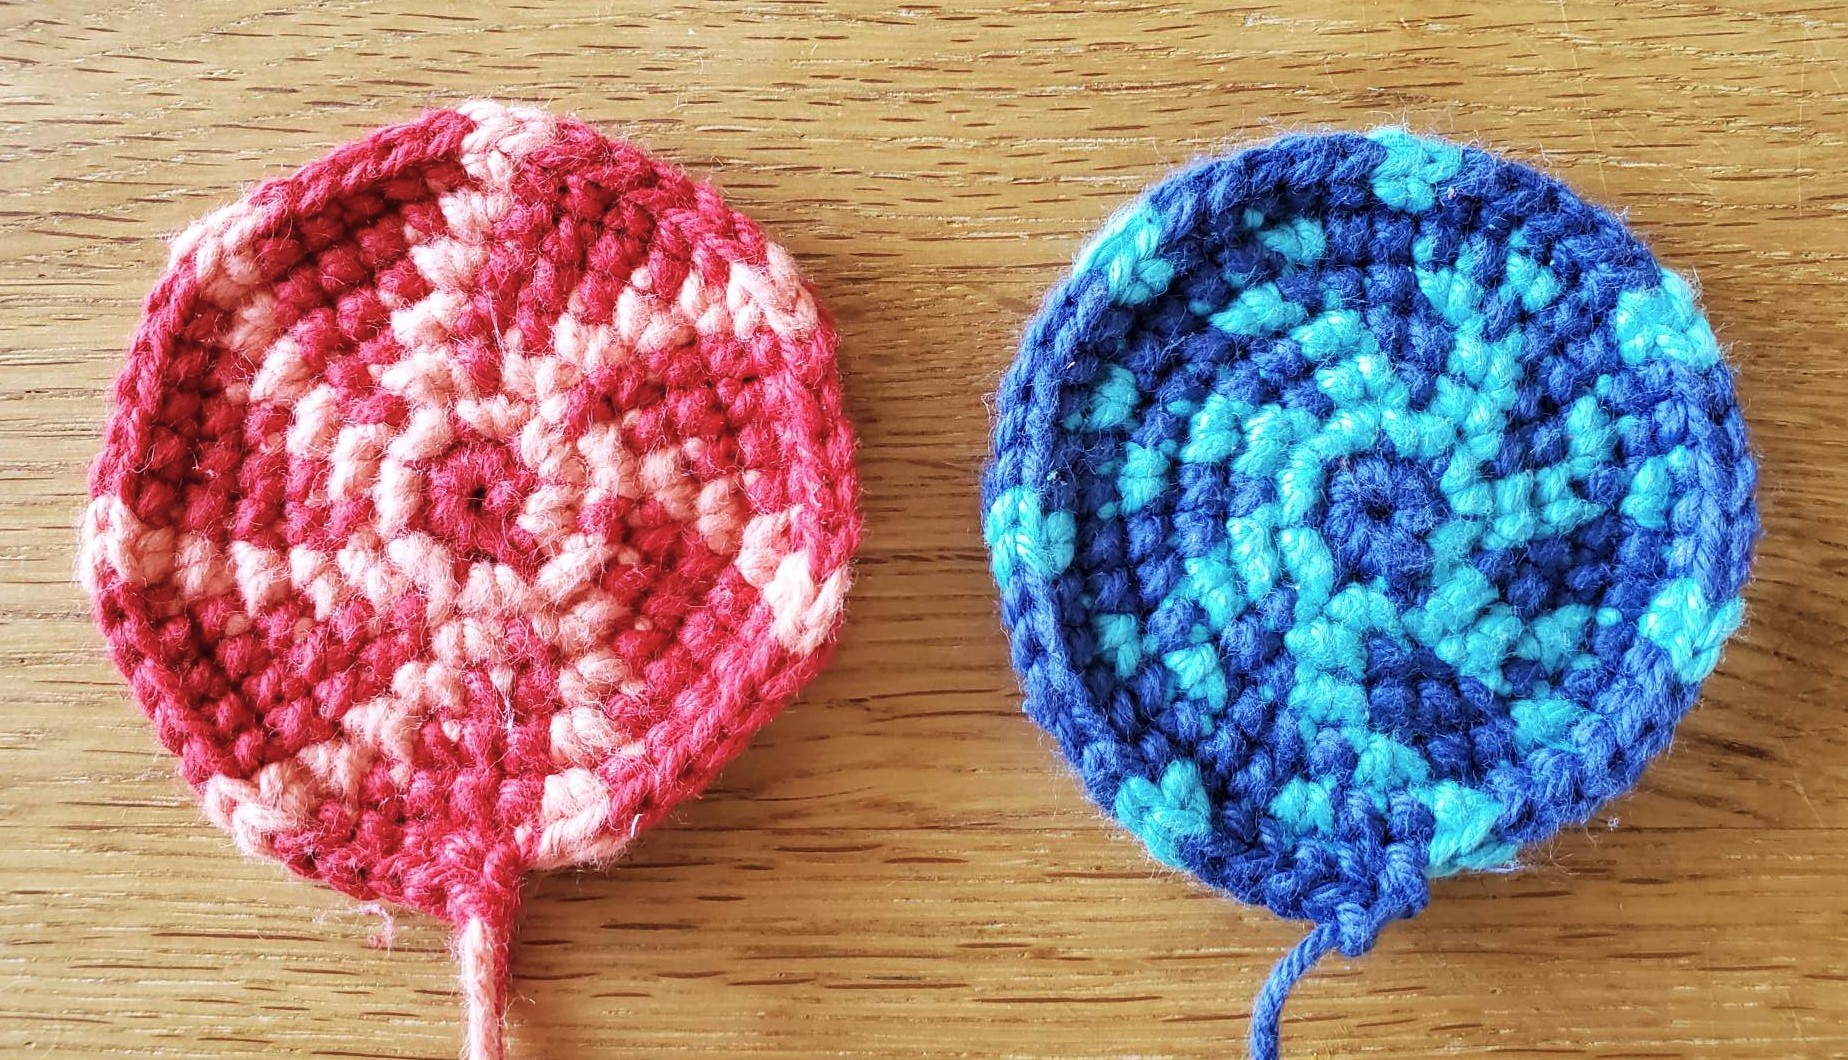
What’s going on in this pic?
On the left: A crochet circle made with stacked increases (the light pink stitches are the increases).
On the right: A circle made with staggered increases (the lighter blue stitches are increases).
Note that the staggered increases produces a smoother edge.
So… staggered or stacked???
Well, unfortunately I don’t have a hard and fast answer about this. Sometimes you may want to employ one or other method based on the outcome you are looking for. For example you might be working on a faceted shape, and in that case, the stacked increases would be perfect. You may also decide that the impact of staggering your stitches is not worth the effort for some projects and, hey, we get it. You do you. Lots of folks are in that camp with you.
Increasing and Shaping:
Messing with the number of increases per round
Rnd 1: MR, sc 6.
Rnd 2: Inc x 6. [12 sts].
Rnd 3: *Sc, inc* x 6. [18 sts].
Rnd 4: *Sc 2, inc* x 6. [24 sts].
(And so on…).
Of course, eventually, the pattern will stop increasing or increase at a different rate to add dimensionality. However, even steadily increasing 6 times per round you’ll begin to notice that things tend to get… well, cup-ish after a few rounds. No big deal, circles that morph into hemispheres make great heads, noses, and paws, right? In fact, normally a little concavity is ideal! But let’s look at what is happening a little closer up, so you can see how to correct for this curvature in the off chance you really DO want a flat circle.
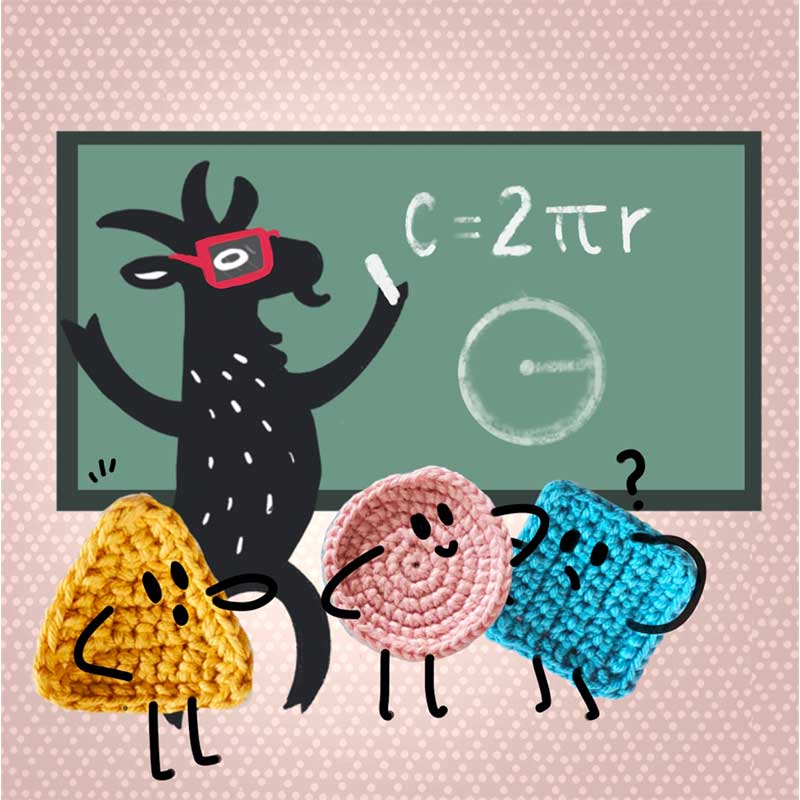
So many ami patterns start off increasing 6 times per round for a couple of reasons. First, since 6 has multiple factors (ie, it can be divided evenly by 1, 2, 3, and 6) placing increases and decreases is very easy. Second, 6 is a pretty decent approximation of 2π (which is 6.2831853072…)–which you may remember from the equation for the circumference of a circle, Circumference = 2π x radius. Therefore, increasing 6 times evenly spaced produces a pretty decent circle. (In all fairness, most designers have probably intuited this rather than chased down the math to understand why it works so well).
So why does this circle start to get noticeably concave around round 4 or 5? Each time you complete a round you have added a round’s worth of thickness to the radius of the circle as well as 6 stitches of length to the circumference–a little less than the 2π stitches that would make a perfect circle. In other words, the circumference of your circle isn’t quite keeping up with the radius as it grows, and you get a slight concavity.
A Look at Concavity
For a more dramatic example, look at what happens when you increase 3, 4, 5, 6, 7, 8, and 9 times per round respectively. On the small end (increasing by 3), you see that the circumference of the circle grows so slowly per round compared to the radius that a sharp cone is formed. On the other end of the spectrum (increasing by 9) the circumference is growing so fast compared to the radius that the edges start to buckle and frill to make up for the excess. If you have seen the many gorgeous crochet corals flying around the internet you have a sense of what this delicious hyperbolic shape looks like. (Because I am a nerd, this also always makes me think of the saddle shaped universe!)
Increasing by 7 falls right in the sweet spot between. Sure, it too is not a PERFECTLY flat circle because we will always be thwarted by that pesky irrational number Pi, but it is remarkably close. So why 7, which is clearly larger than 2π? This has to do with the slight difference in size between an increase and two regular stitches which affects the actual length you are adding to the circumference each round. (I did the measurements and the math, and believe me when I tell you there is no need to get lost in those weeds right now!) Increasing by 7 looks even better when you stagger the placement of the increases from round to round so they don’t fall right on top of each other.
Could you design an even flatter, more perfect circle? Possibly. Perhaps adding or omitting an occasional increase could minimize any remaining curvature, but would it be worth the effort of having to count it out? That is up to you to decide!
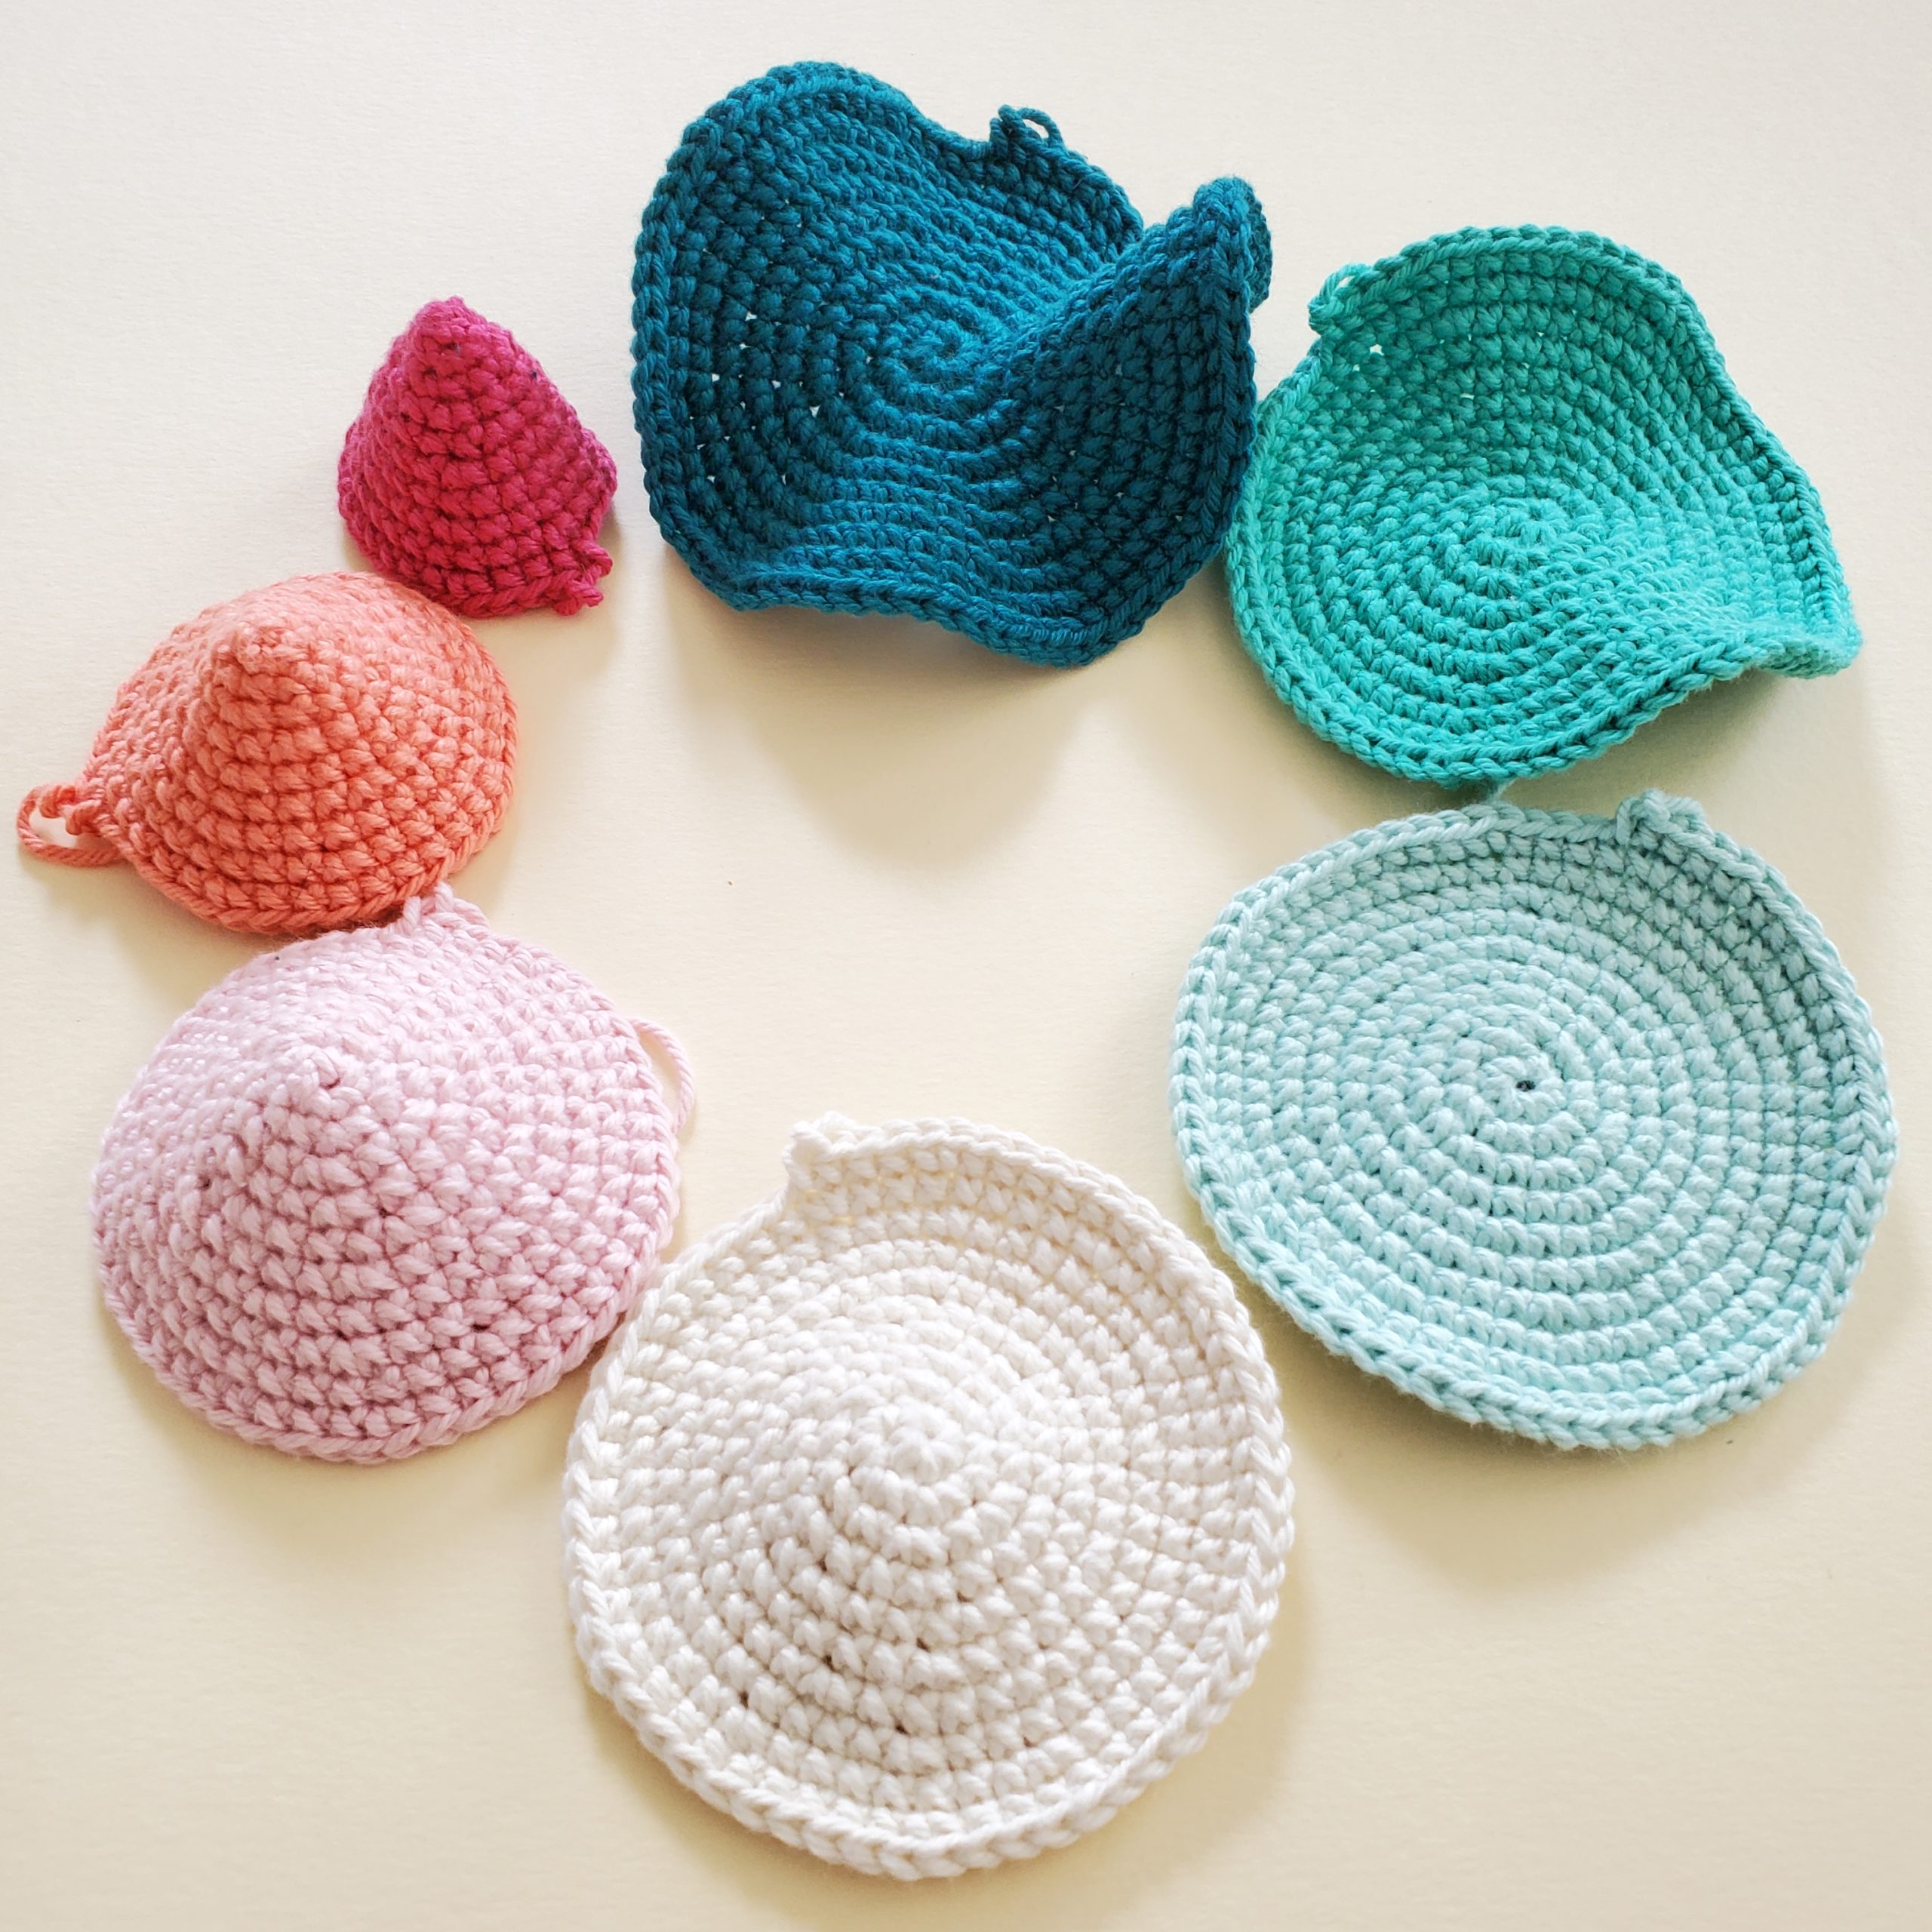
What’s going on in this pic?
Each of these shapes starts with a magic ring and then inceases by a consistent number of stitches in each round.
The hot pink cone at the 11 o’clock position begins with 3 sc into a magic ring then, increases by 3 sts evenly spaced in each subsequent round.
Moving around counter-clockwise the following shapes are formed as described below.
Salmon: 4sc into a MR, inc 4x in each subsequent round
Powder pink: 5sc into a MR, inc 5x in each subsequent round
White: 6sc into a MR, inc 6x in each subsequent round
Baby blue: 7sc into MR, inc 7x in each subsequent round
Teal: 8sc into MR, inc 8x in each subsequent round
Deep turqoise: 9sc into MR, inc 9x in each subsequent round
Scalable Templates:
Crochet Circles Three Ways
One of my π-in-the-sky hopes for this blog is to encourage you to step out into design if you haven’t started already. To that end, I am planning to share templates you can scale and adapt in your designs wherever possible. In each of the following templates you will see the increase pattern developed over the first few rounds and can extrapolate that out to whatever size circle you need. Because I am a Type 1 (my enneagram homies will know this means I am a perfectionist) I have staggered my increases in each of these templates. If you prefer to stack them, you can easily alter the templates by placing all your increases in the last stitch of each pattern repeat.
You can also choose to increase or decrease the number of increases per round, but, as we discussed above, you will be veering away from circles and into hemispheres, cones, or saddle shapes depending on the number of increases you choose to make. This is how amigurumis are formed! Here at Freddy Goat, we are all for experimentation, so we encourage you to give it a go!
These templates are written using US crochet symbols. For a refresher on crochet symbols check out Crochet 101.
Now, without further ado…
The Most Useful Circle –
Spiral/Continuous Rounds
- MR, sc 6. [6 sts]
- Inc x 6. [12 sts]
- *Inc, sc* x 6. [18 sts]
- *Sc, inc, sc* x 6. [24 sts]
- *Sc 3, inc* x 6. [30 sts]
Work as many rounds as desired, making 6 evenly spaced increases in the pattern established in the last 3 rounds. To fasten off, sl st, break the yarn, and invisible join.
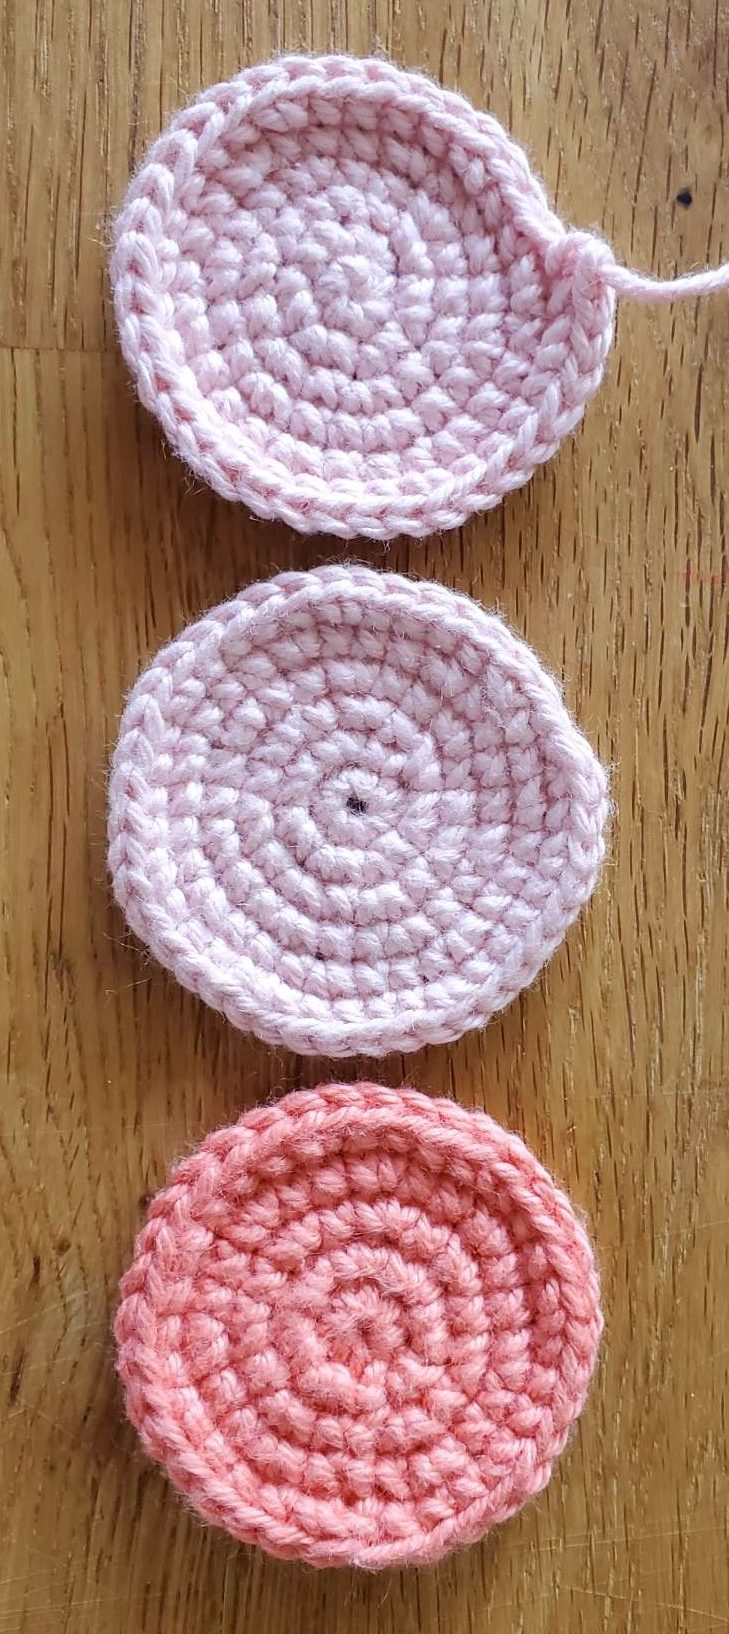
(The circle at the top of the image on the right is made in this way).
The Flattest Crochet Circle –
Spiral/Continuous Rounds
- MR, sc 7.
- Inc x 7. [14 sts]
- *Inc, sc* x 7. [21 sts]
- *Sc, inc, sc* x 7. [28 sts]
- *Sc 3, inc* x 7. [35 sts]
Work as many rounds as desired, making 7 evenly spaced increases in the pattern established in the last 3 rounds. To fasten off, sl st, break the yarn, and invisible join.
(The circle in the center of the image on the right is made in this way).
Flattest Crochet Circle –
Joined Rounds
- MR, sc 7, sl st in first st of Rnd. [7 sts] In this and all subsequent Rnds, sl sts are not treated as a st and are ignored.
- Ch 1, inc in same st as ch-1, inc x 6, sl st in first st of Rnd. [14 sts]
- Ch 1, inc is same st as ch-1, sc, *inc, sc* x 6, sl st in first st of Rnd. [21 sts]
- Ch 1, sc in same st as ch-1, inc, sc, *sc, inc, sc* x 6, sl st in first st of Rnd. [28 sts]
- Ch 1, sc in same st as ch-1, sc 2, inc, *sc 3, inc* x 6, sl st in first st of Rnd. [35 sts]
Work as many rounds as desired, making 7 evenly spaced increases in the pattern established in the last 3 rounds. To fasten off, omit the final sl st and invisible join directly into the first st of the Rnd.
(The circle at the bottom of the image on the right is made in this way).
Free Pattern: Sun and Moon Ornament
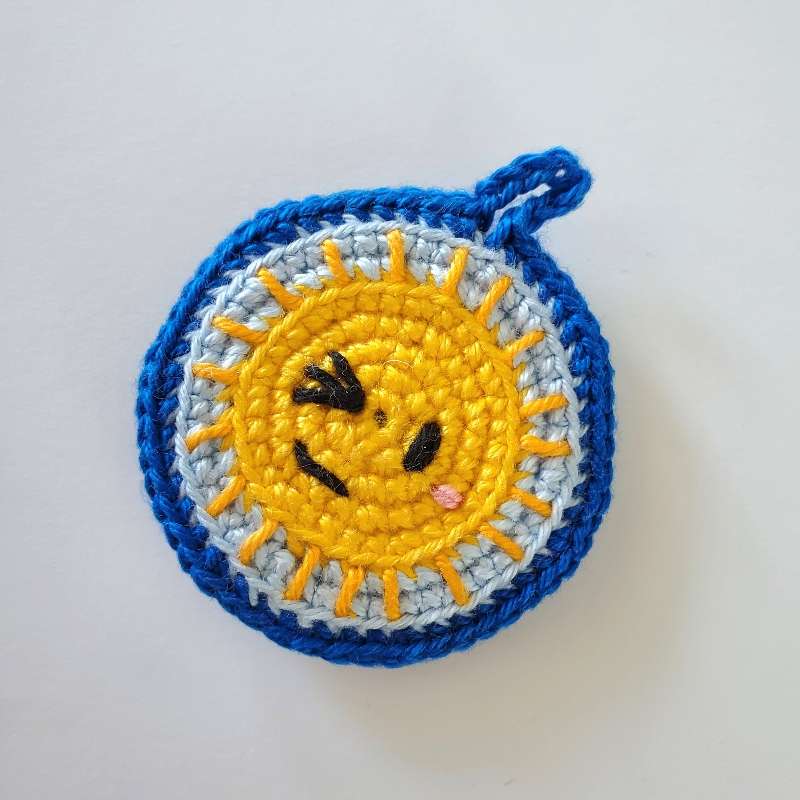
I also set myself the rather ambitious goal of giving you a simple free pattern in each installment of this blog. (Am I bonkers? Yes. Yes, I am. I am out of my mind.) Our first Ge-Ami-try free pattern is an ornament for, I dunno, hanging on things. It incorporates the Flat Joined Rounds template above and is a quick and super simple make. Having said that, don’t hesitate to drop a comment or email us if you need any assistance. We are all on the learning curve together!
This simple pattern is worked in joined rounds. Give it a spin and try out what we just discussed above. We’d love to see your finished product and hear how it went. Give us a tag on Instagram @freddy_goat_crochet if you get a chance!
Sun
- Worked in joined Rounds.
- Begin in Yellow.
- MR, sc 7, sl st in 1st st of Rnd. [7 sts]
- Ch 1, inc in same st as ch-1, inc x 6, sl st in first st of Rnd. [14 sts]
- Ch 1, inc in same st as ch-1, sc, *inc, sc* x 6, sl st in first st of Rnd. [21 sts]
- Ch 1, sc in same st as ch-1, inc, sc, *sc, inc, sc* x 6, sl st in first st of Rnd. [28 sts]
- Ch 1, sc in same st as ch-1, sc 2, inc, *sc 3, inc* x 6, sl st in first st of Rnd. [35] Break the yarn and invisible join.
- Work this round in BLO. Join Blue with sc in any st, sc, inc, sc 2, *sc 2, inc, sc 2* x 6, sl st in first st of Rnd. [49 sts]
- Ch 1, inc in same st as ch-1, sc 5, *inc, sc 5* x 6, sl st in first st of Rnd. [51 sts]
Break the yarn and invisible join. Then, embroider the face and solar rays.
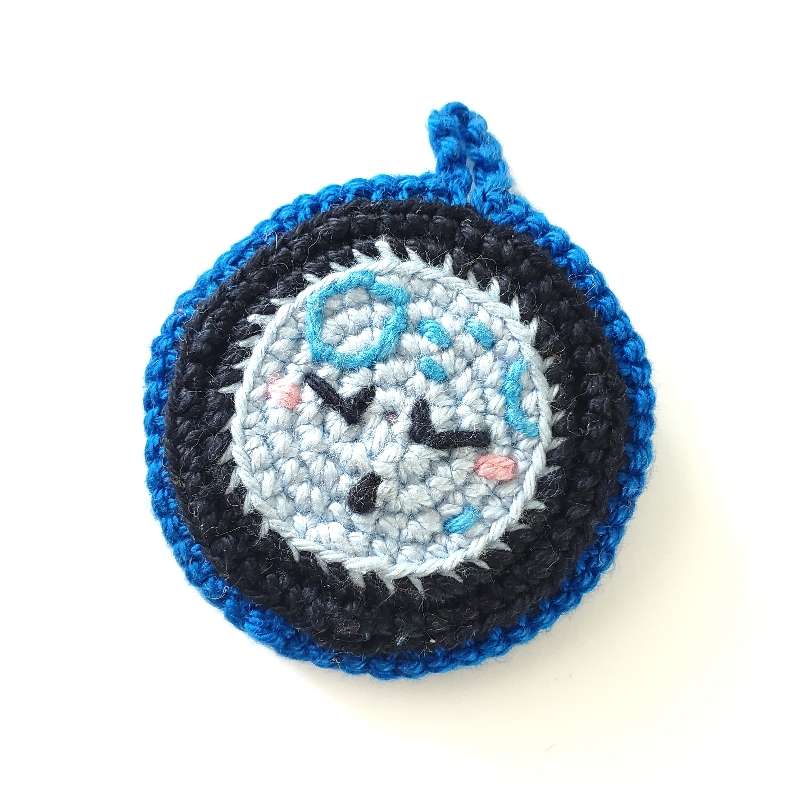
Moon
- Worked in joined rounds.
- Begin in Baby Blue.
- MR, sc 7, sl st in 1st st of Rnd. [7 sts]
- Ch 1, inc in same st as ch-1, inc x 6, sl st in first st of Rnd. [14 sts]
- Ch 1, inc in same st as ch-1, sc, *Inc, sc* x 6, sl st in first st of Rnd. [21 sts]
- Ch 1, sc in same st as ch-1, inc, sc, *sc, Inc, sc* x 6, sl st in first st of Rnd. [28 sts]
- Ch 1, sc in same st as ch-1, sc 2, inc, *sc 3, inc* x 6, sl st in first st of Rnd. [35] Break the yarn and invisible join.
- Work this round in BLO. Join Black with sc in any st, sc, inc, sc 2, *sc 2, inc, sc 2* x 6, sl st in first st of Rnd. [42 sts]
- Ch 1, inc in same st as ch-1, sc 5, *inc, sc 5* x 6, sl st in first st of Rnd. [49 sts]
Break the yarn and invisible join. Embroider face and craters.
Assembly
Mark the st centered above the face of each piece and align them back to back.
Using Navy Blue, attach both pieces by crocheting through the BLO of one and FLO of the other: *sc 3, inc, sc 3* x 7. [56 sts] When you reach the two marked sts, pause wherever you are in the pattern repeat, ch 7, then continue working the pattern repeat where you left off. This forms a loop you can use to hang your ornament.
If you want, stuff the ornament lightly before sealing it completely. Break the yarn, fasten off, and weave in the ends.
If you need a refresher on the stitch symbols or how to make any of the stitches employed here, check out Crochet 101 for some help. In the meantime, here is a quick key to the abbreviations used in this pattern.
magic ring (MR)
single crochet (sc)
slip stitch (sl st)
round (Rnd)
increase (inc)
stitch(s) (st/sts)
back loops only (BLO)
front loops only (FLO)
You can also download our Terms and Techniques pdf to use on the go!
Parting Thoughts
That is a wrap, folks! We would love to see your work or answer any questions you might have, so don’t be afraid to get in touch. The next installment will be another basic 2D shape, so keep your eyes peeled.

Written by Freddy
Related Articles
Yarn Color Combinations – The Value of Color.
Hi All! Welcome back and happy New Year! Today I want to continue with our beginner’s guide on how to choose yarn color combinations. If you are wondering how to do that, this is the place for you. In each article, I try to explain a little about Color Theory so you...
Week 2: Trying Out Crochet Triangles
Wow! This was an incredibly difficult post to get started on! To be perfectly honest, I almost never use triangles in amigurumi creation, so I didn’t have much insight to impart when I sat down to write this. Then I realized that might be a blind-spot worth exploring....
Week 2: Useful Crochet Techniques
Hello! So glad to see you again. By now you have had several weeks to try out all the basic stitches we covered in our last blogpost (ch, sl st, sc, hdc, dc, tr) and are hopefully feeling pretty good about your hook control, tension, and ability to make the stitches....

hi! I also love circles